Custom Model Extractor Guide
Welcome to the FormX Custom Model Extractor Guide! This guide will walk you through the process of creating a custom model extractor on the FormX portal. Let's explore how this feature can meet the unique needs of your business.
What is Custom Model Extractor?
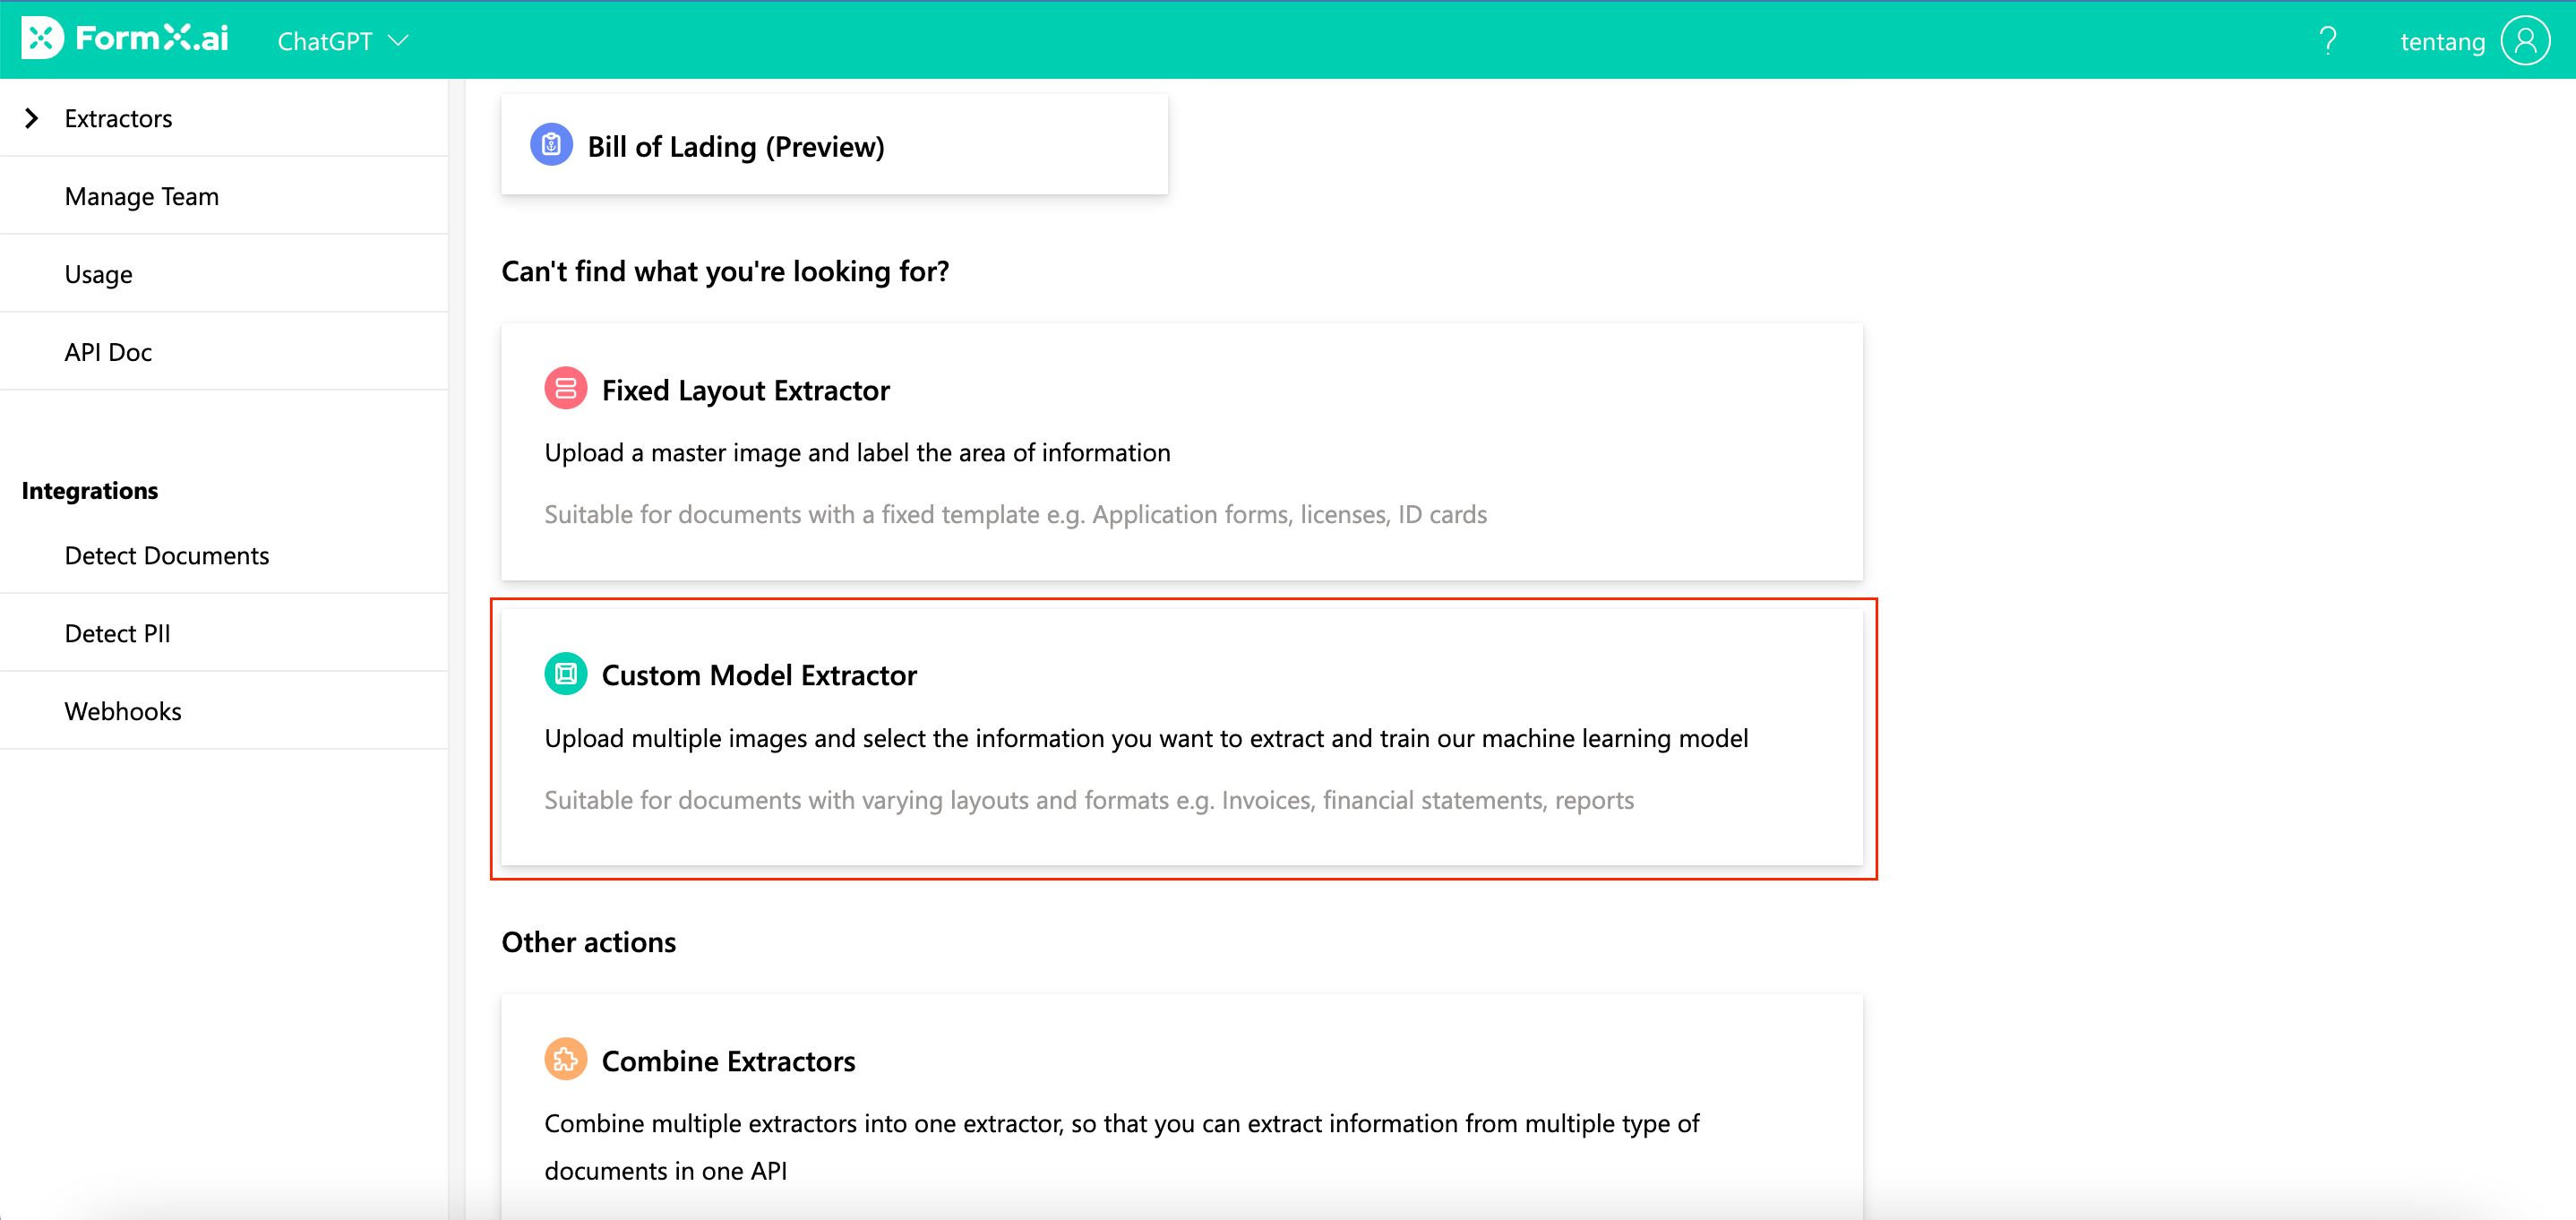
Custom Model Extractor is a powerful tool within FormX that offers flexibility and adaptability. It enables you to handle documents with varying structures and formats, allowing for precise information extraction tailored to your requirements.
If the documents you want to extract does not belongs to the pre-built extractor types, create a "Custom Model Extractor" from the portal.
Instant Models: Setting up a Custom Model Extractor with 0-3 Samples
During the initial setup, you will be asked to upload zero to 3 samples. Yes, it is possible to create a custom model with just 3 samples or even less! The initial set up process takes only around 15 minutes, here is what to expect:
Step 1. Define the data fields you want to extract
Set up the extractor by first defining the data fields you want to extract. You can build from scratch or use our templates.
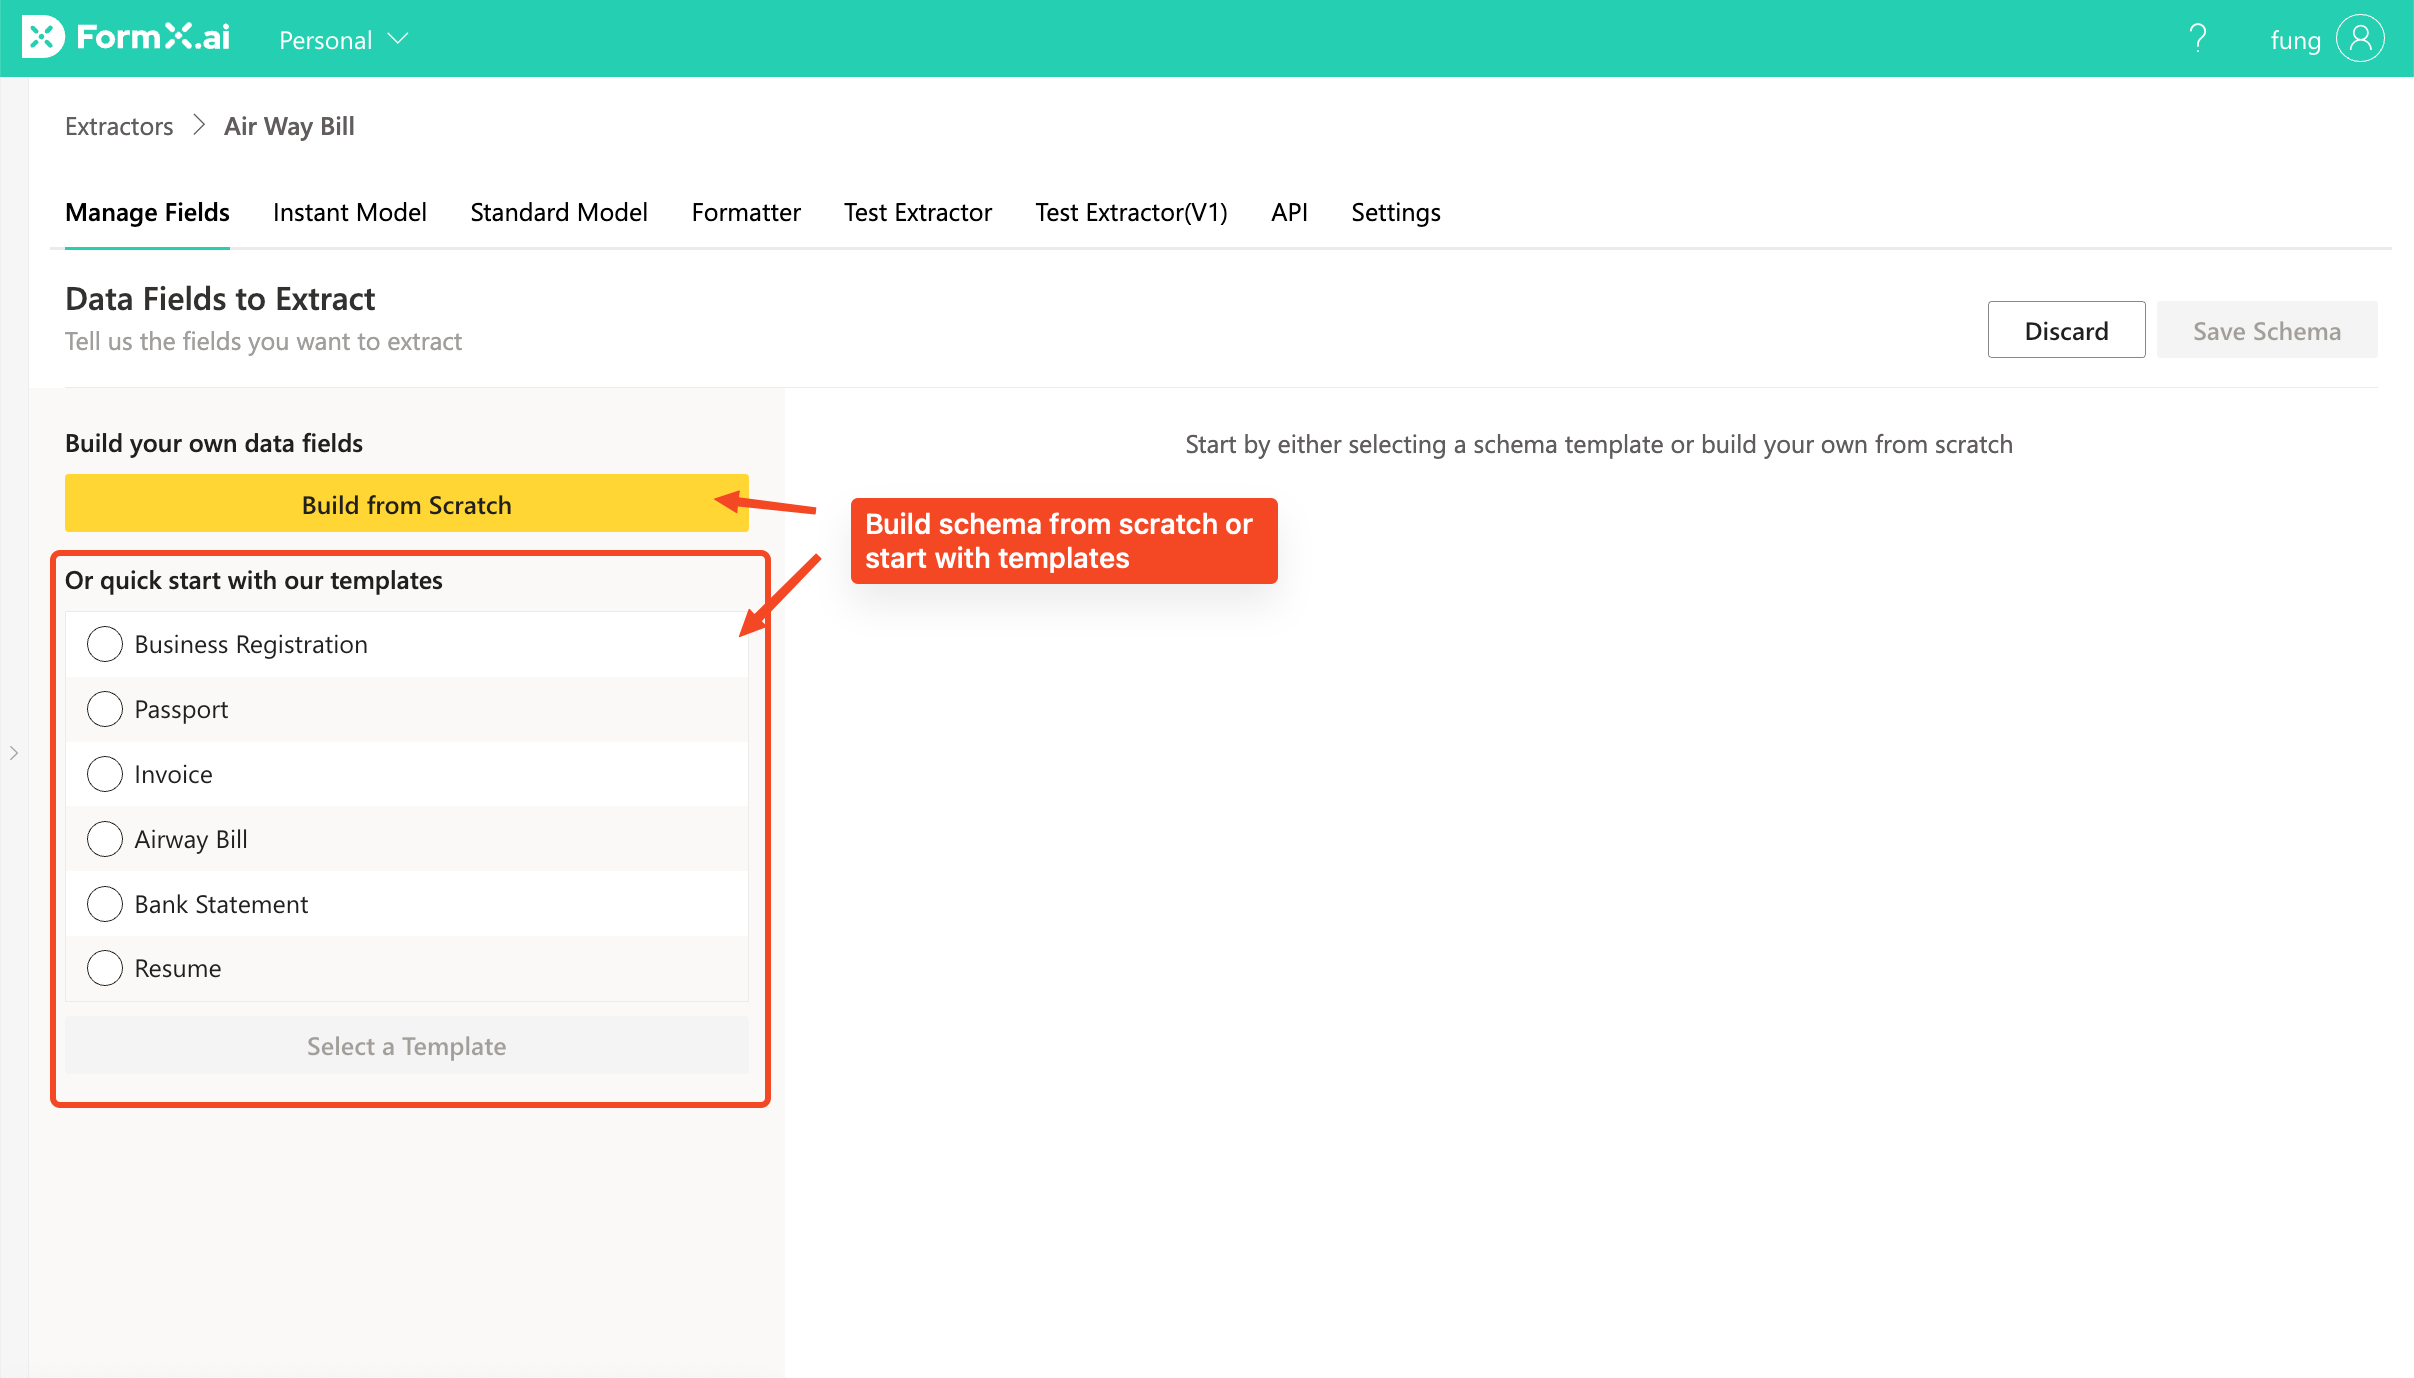
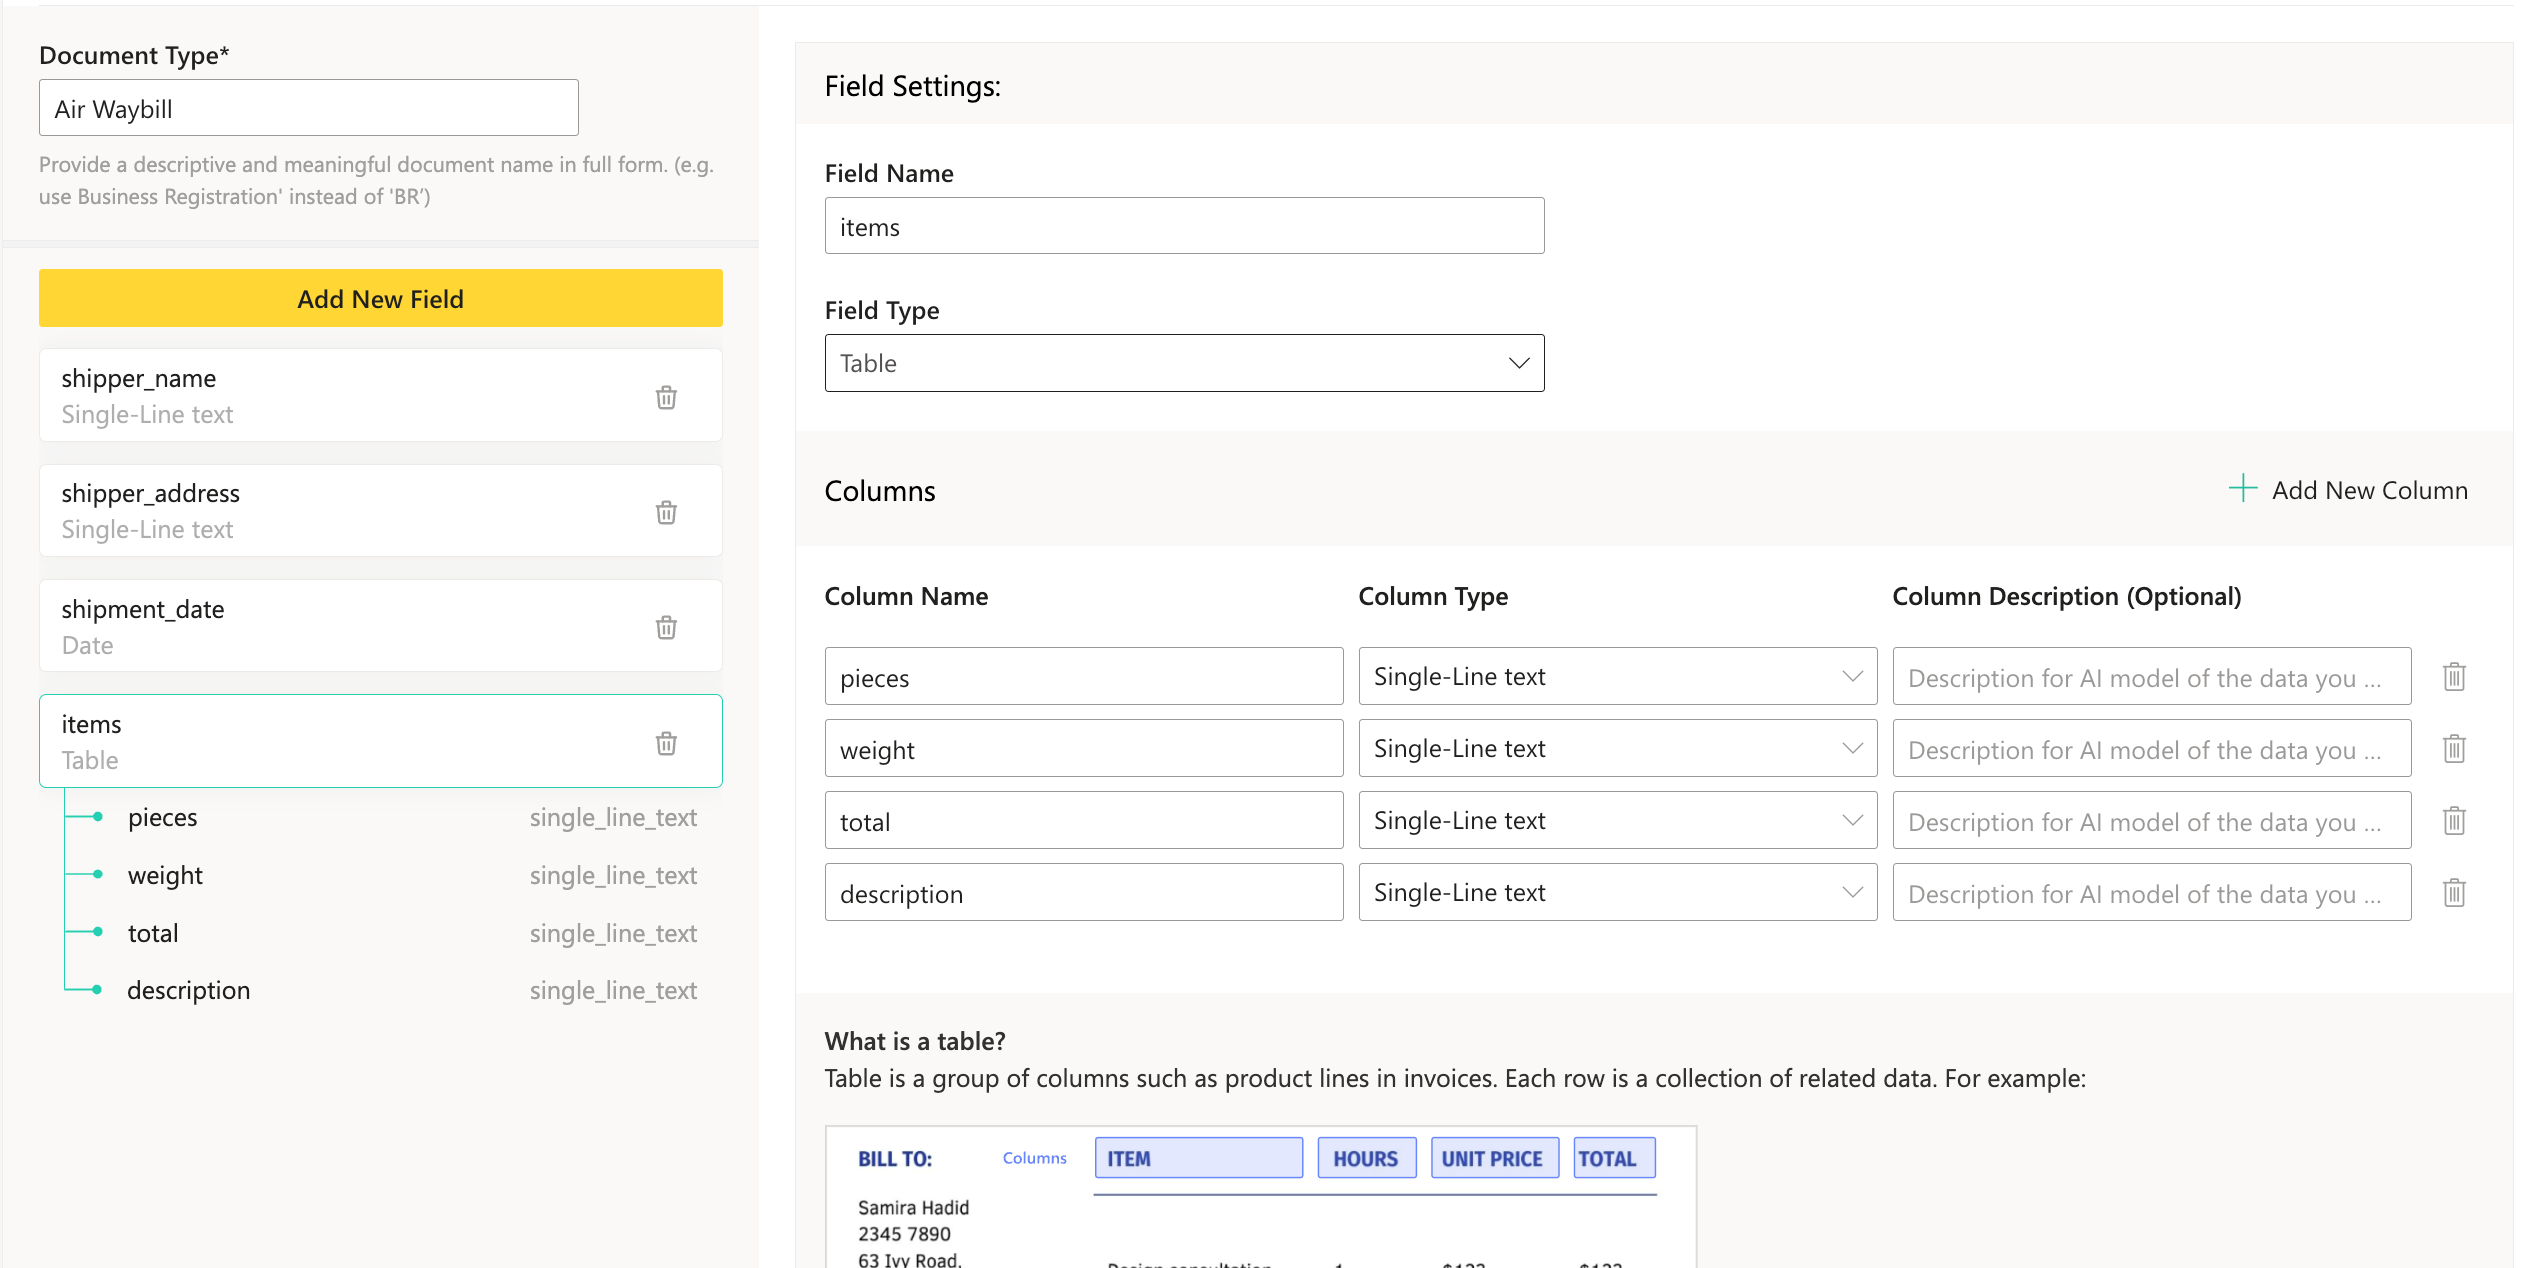
In "Document Type", provide a concise name for the document, using full form instead of abbreviations. For example, use "Air Waybill" instead of "AWB".
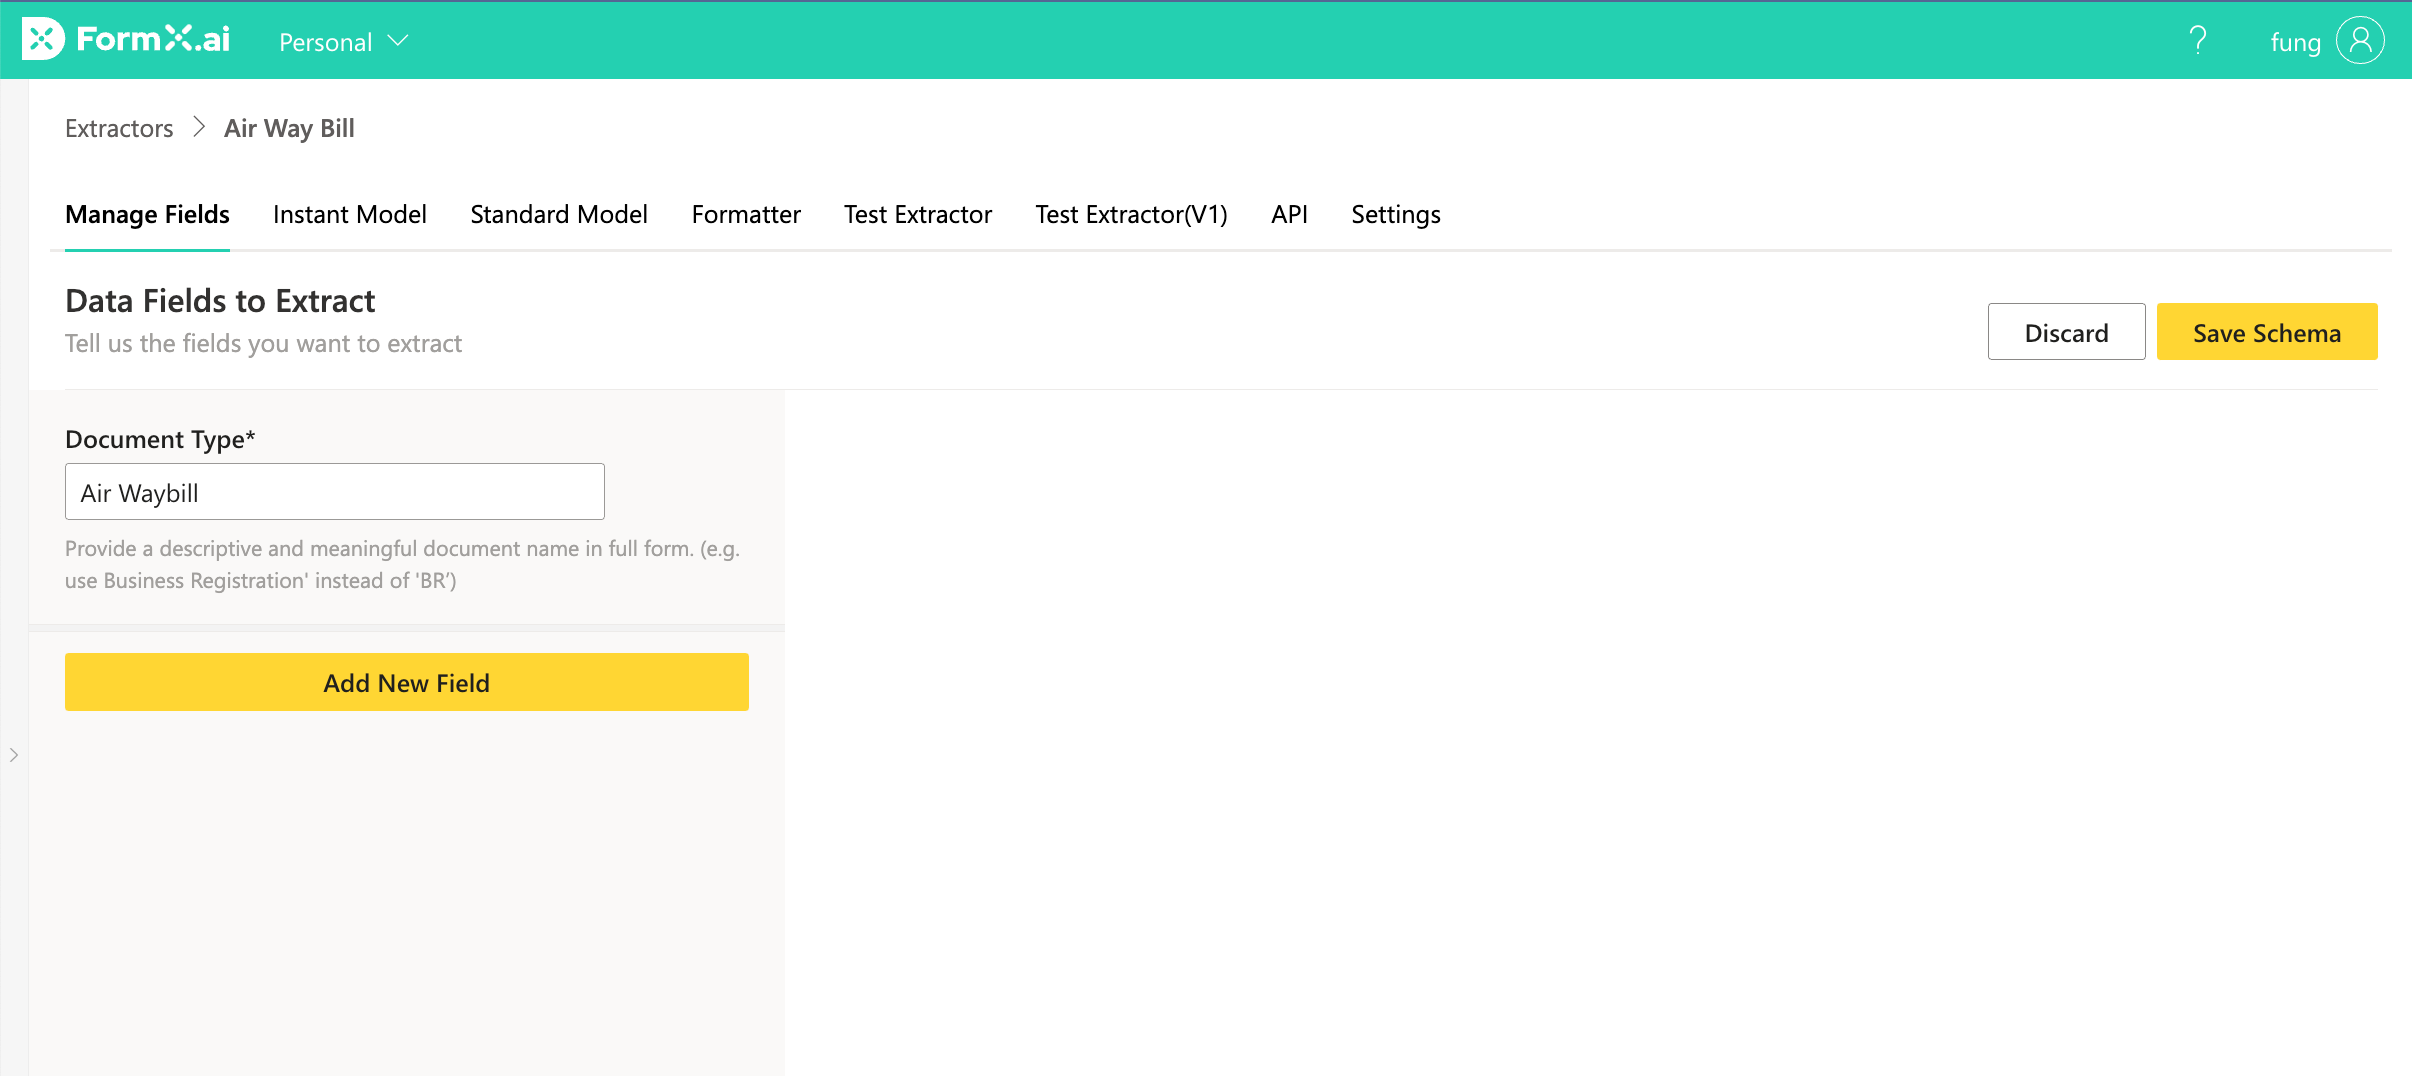
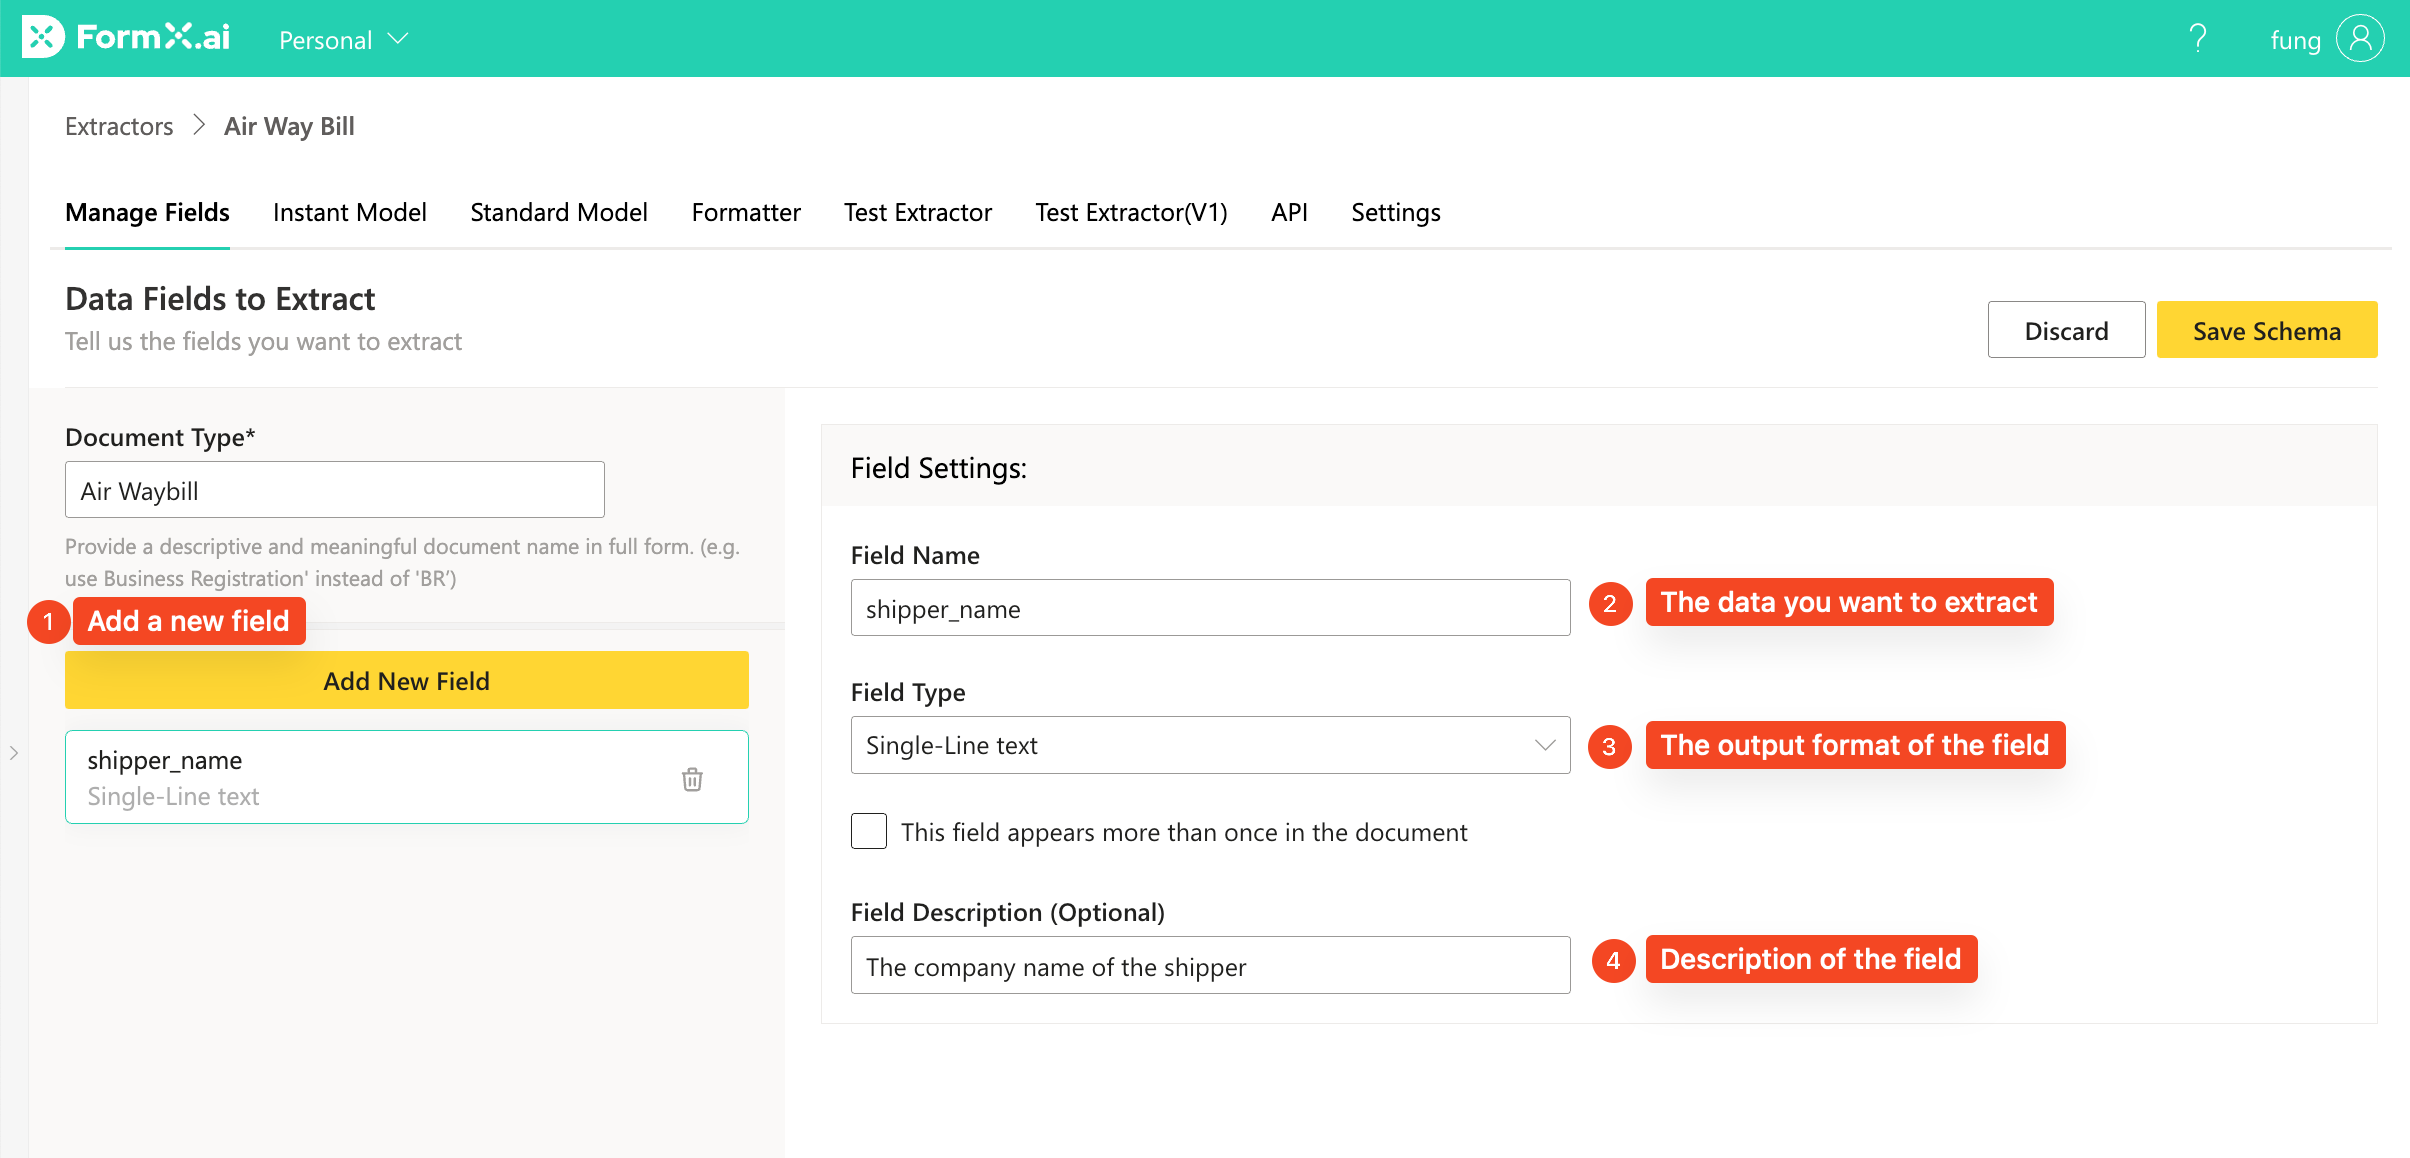
After setting the Document Type, press "Add New Field" to add a new data field. For each field, you should define the following
- Field Name: This is the field name of the data you want extract. The value will be presented with this key in the JSON response from FormX. The field name should be a meaningful phase. e.g. use "shipper_name" instead of "field_a"
- Field Type: This defines the type nature of the fields. You can choose from "Single-line Text", "Multi-line Text", "Date" and "Table"
- Field Description: You can write a short description for the field. This helps the AI model to understand the data you want.
Use Table type for table like structures, for example each item on the document contains "weight", "total amount" information. You can define an "items" field and use the properties as the columns.
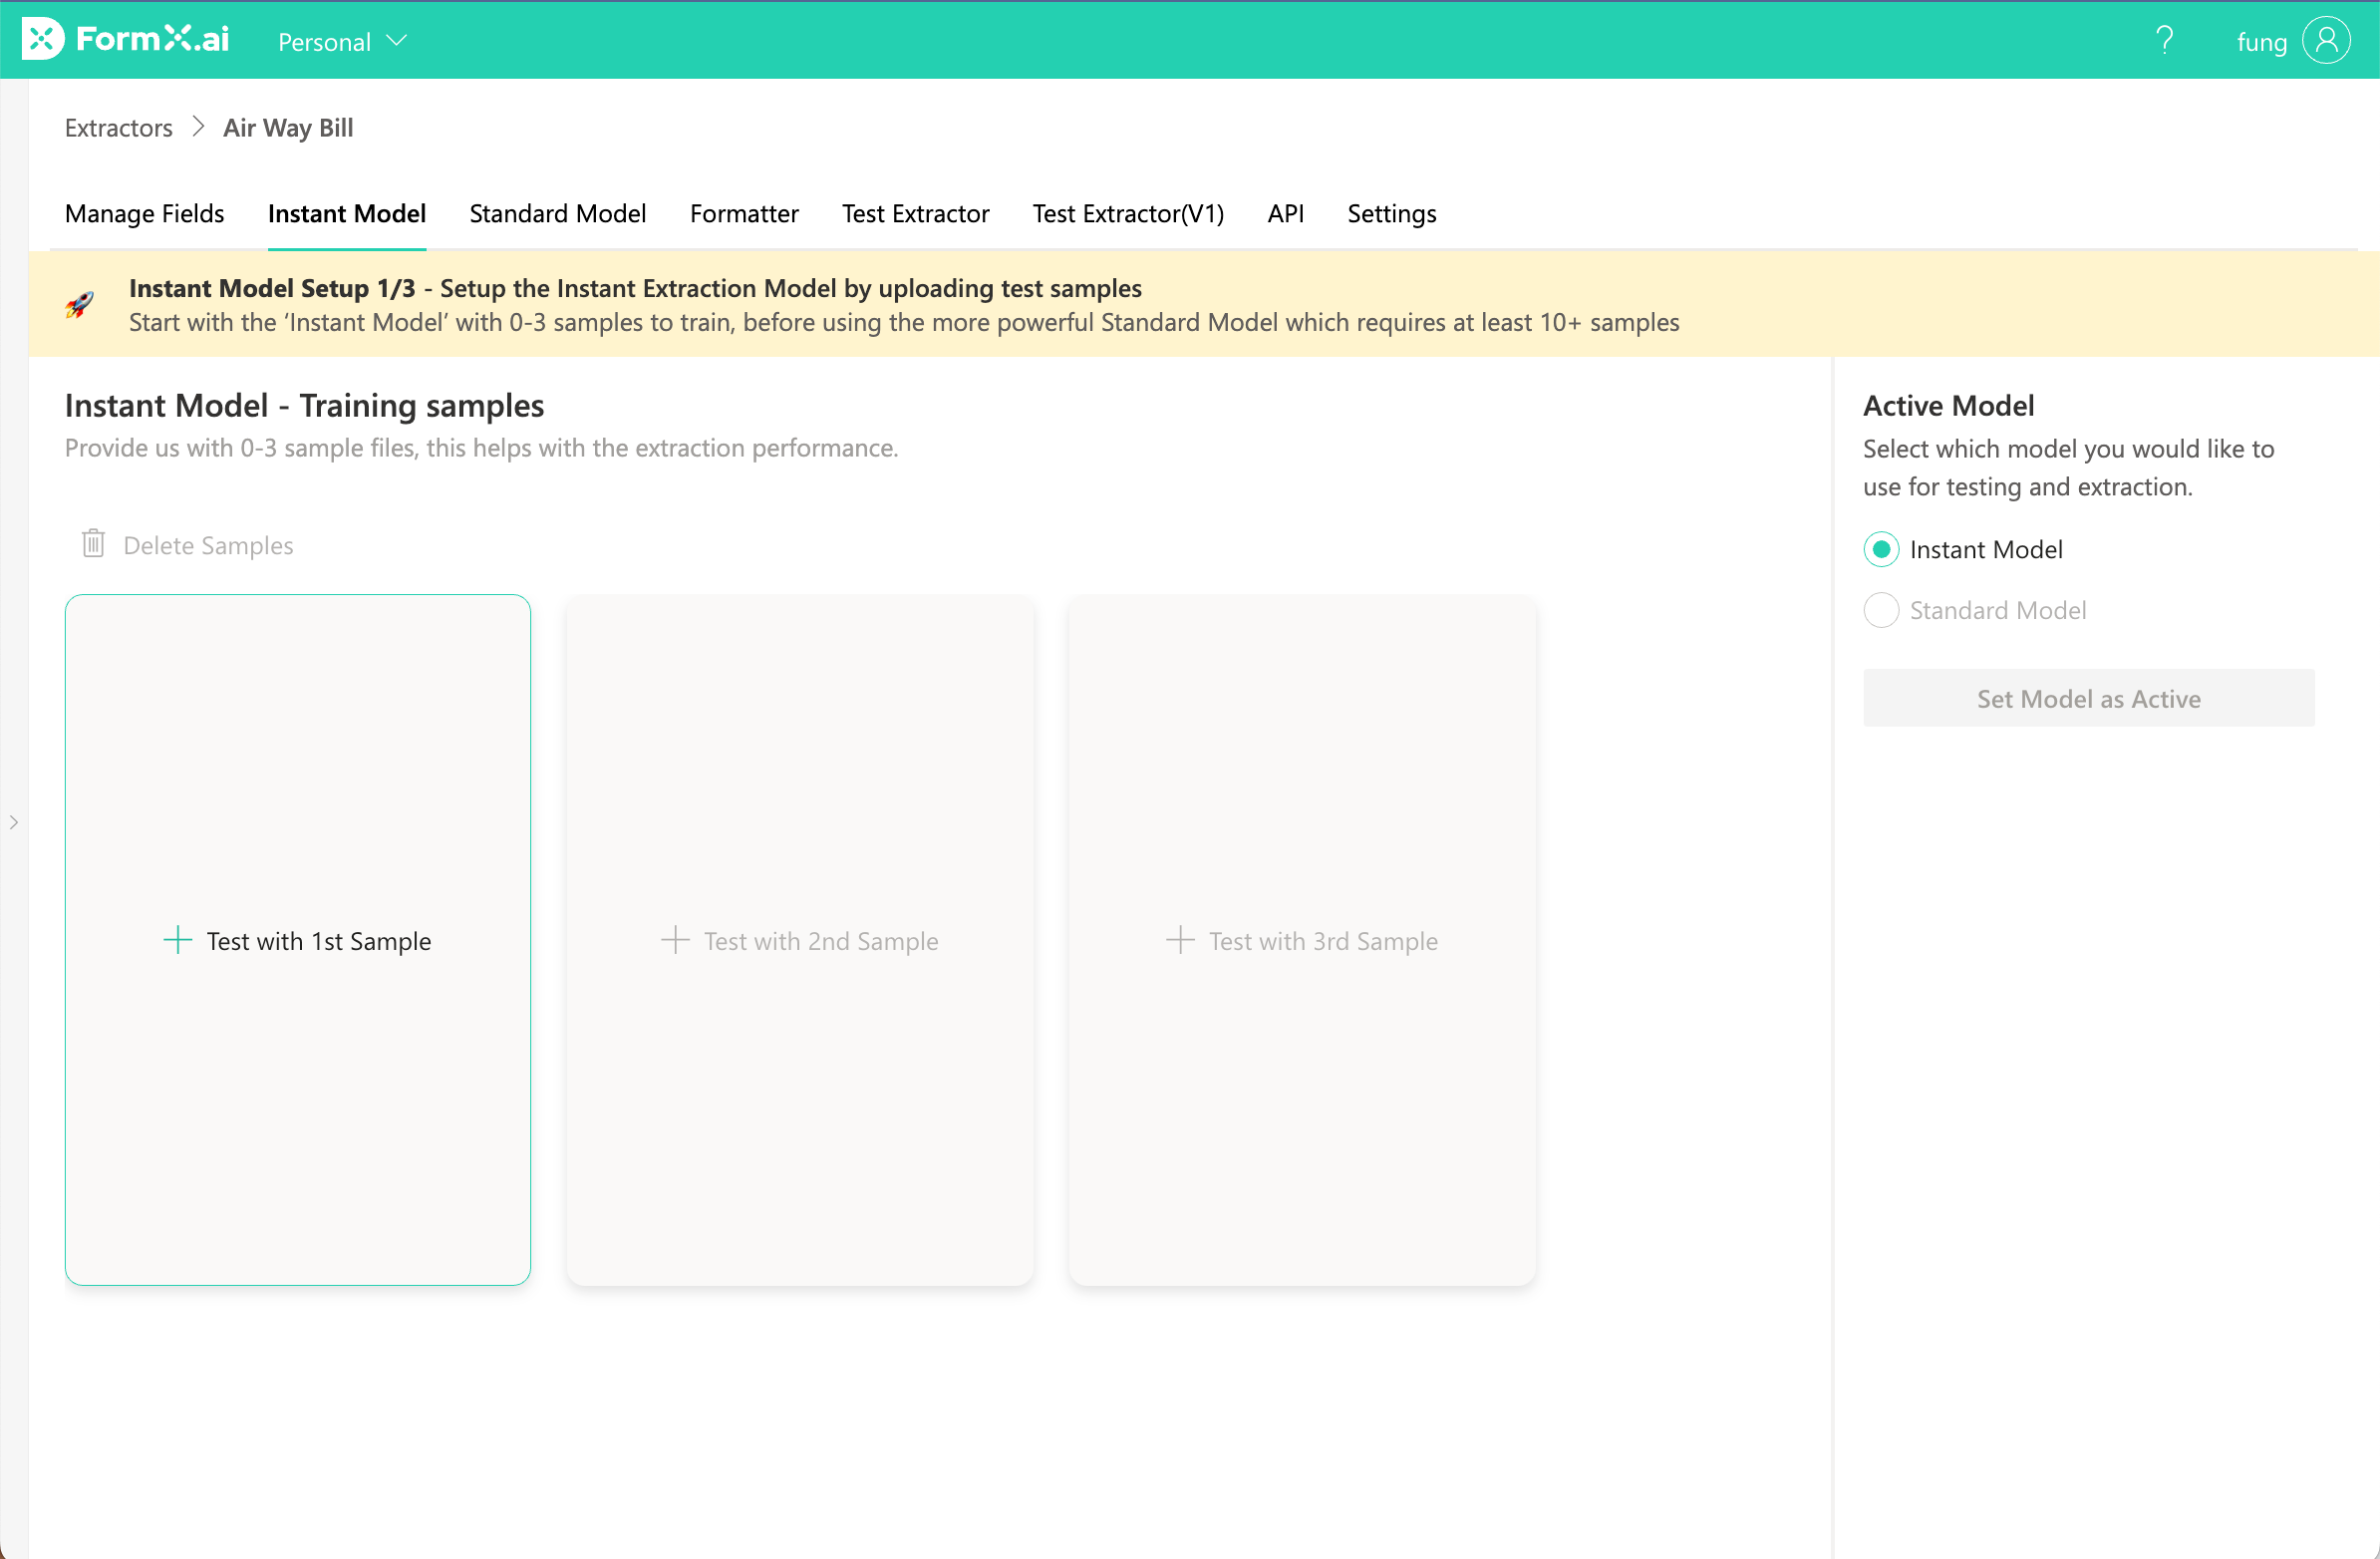
Step 2: Upload the first sample
After saving the data schema, you can go to the "Instant Model" tab to update the 1st sample for testing.
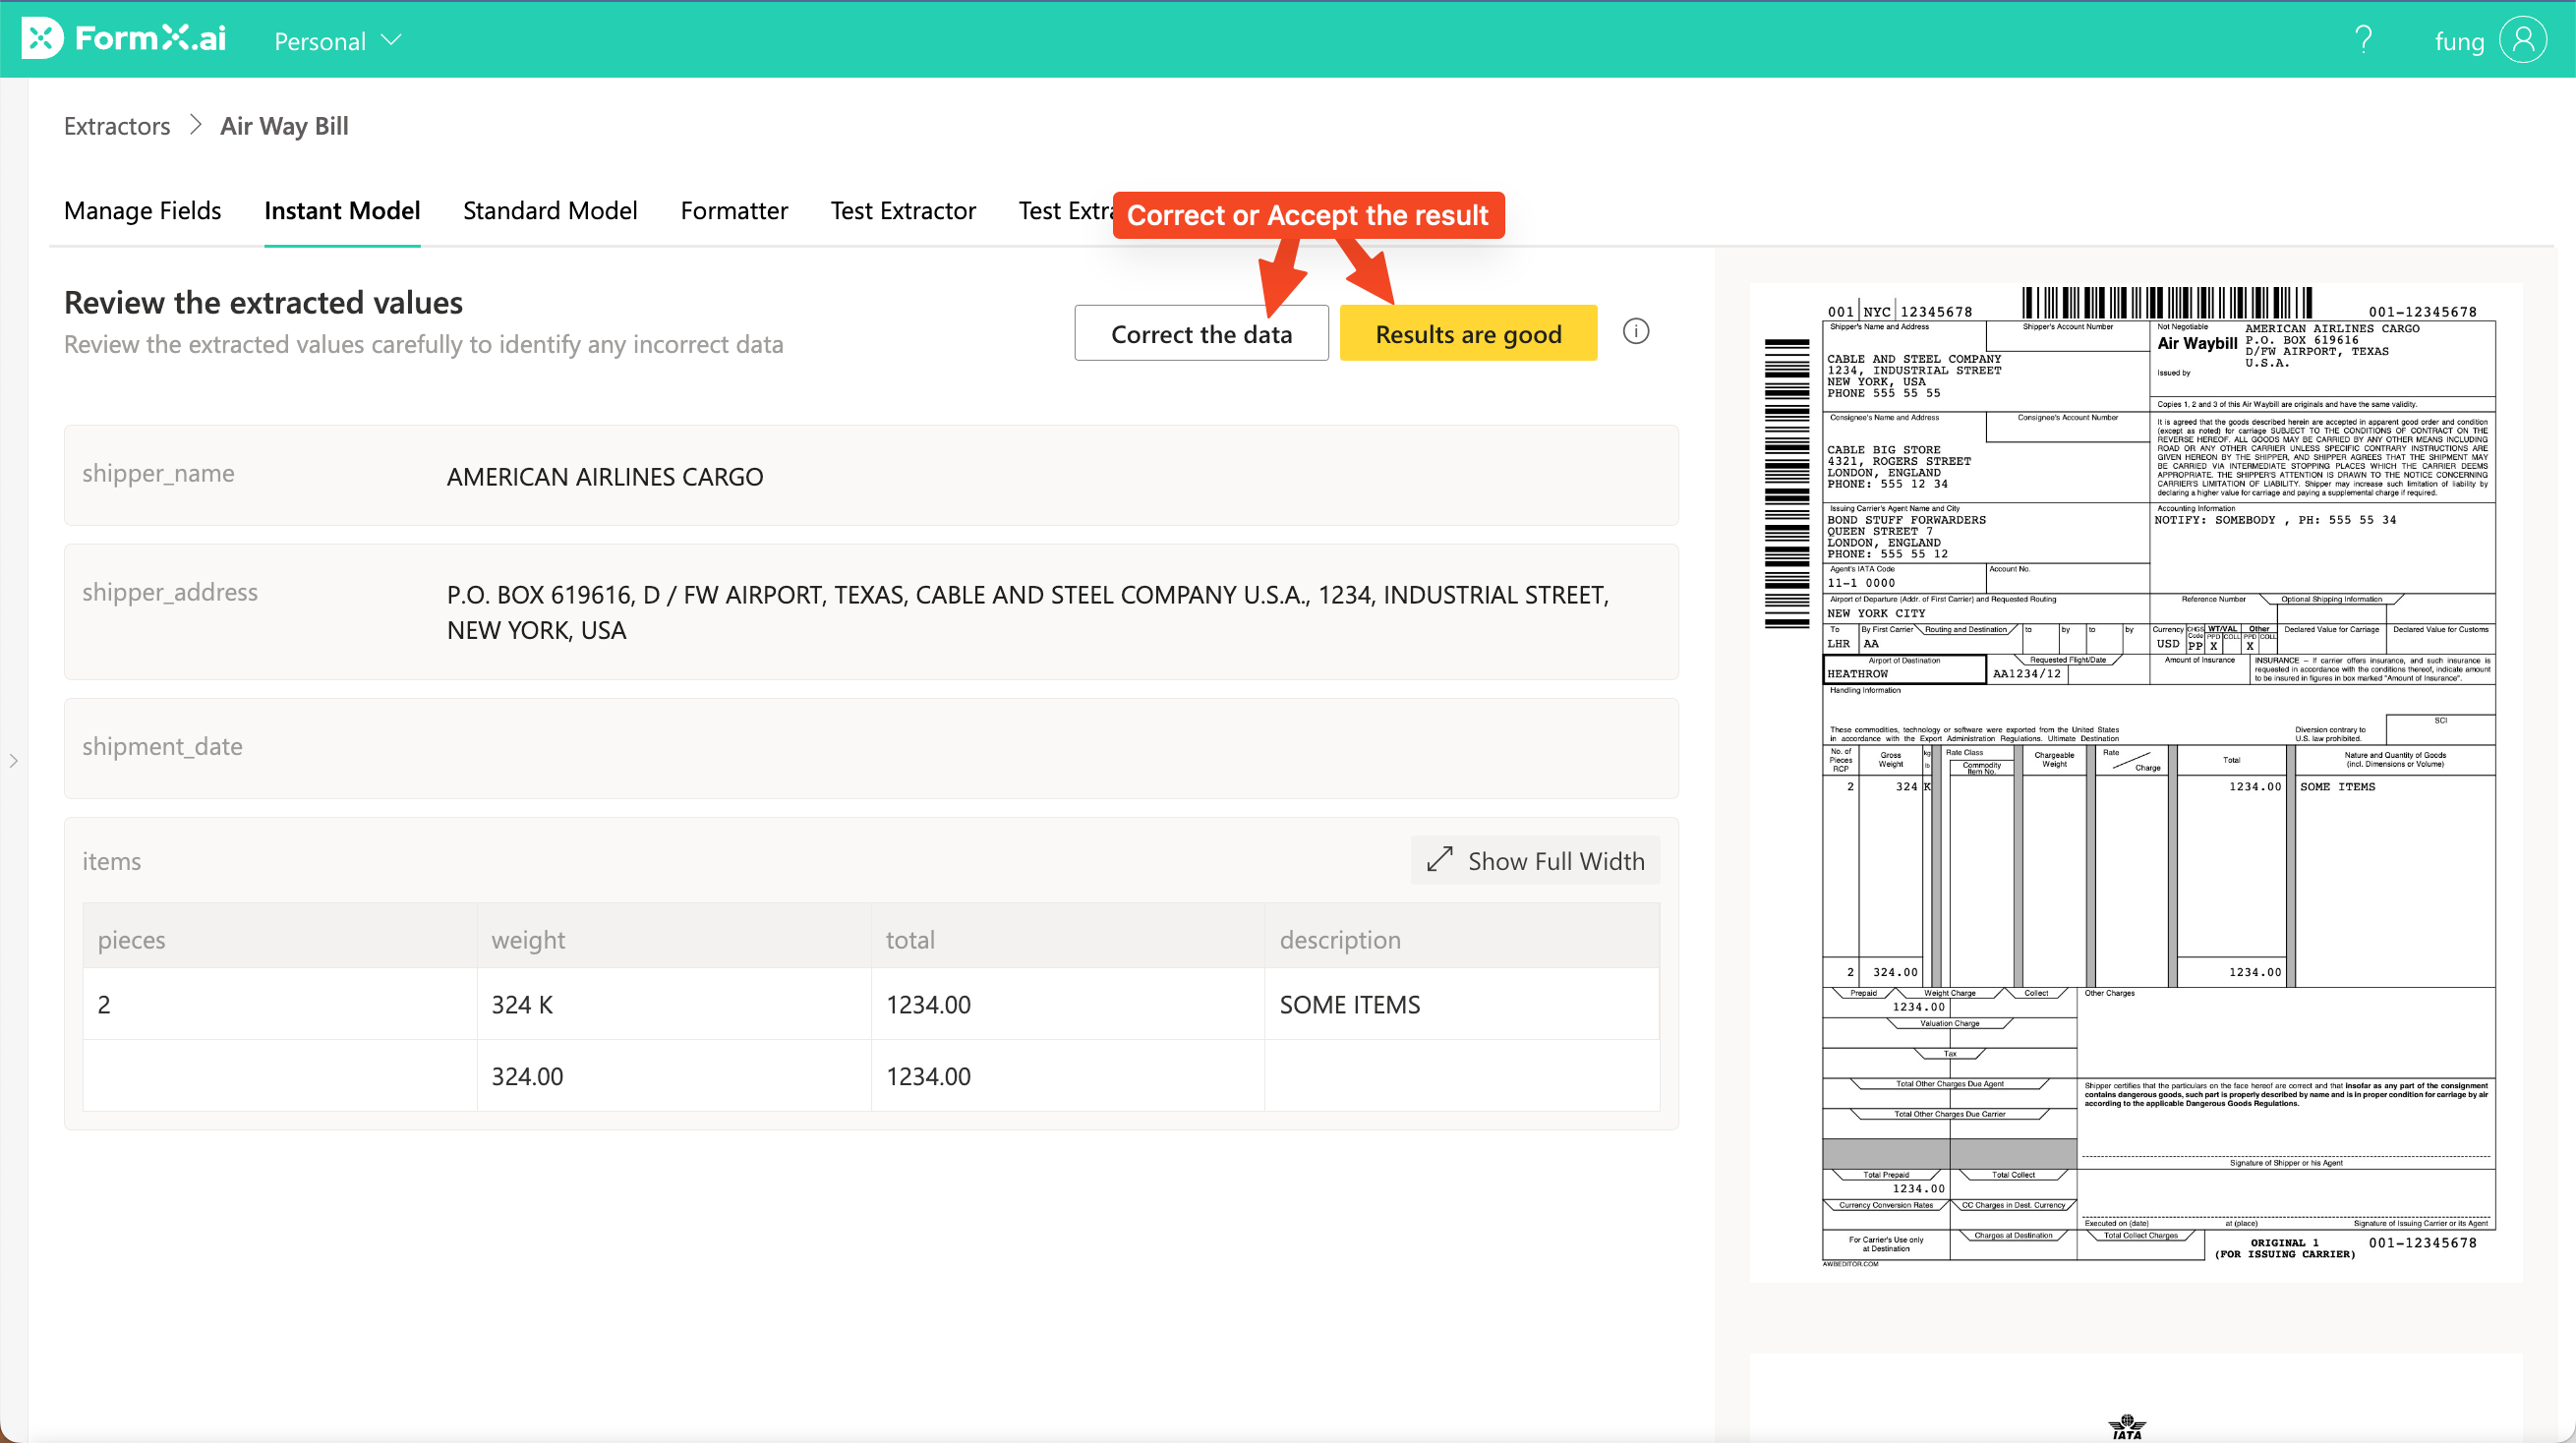
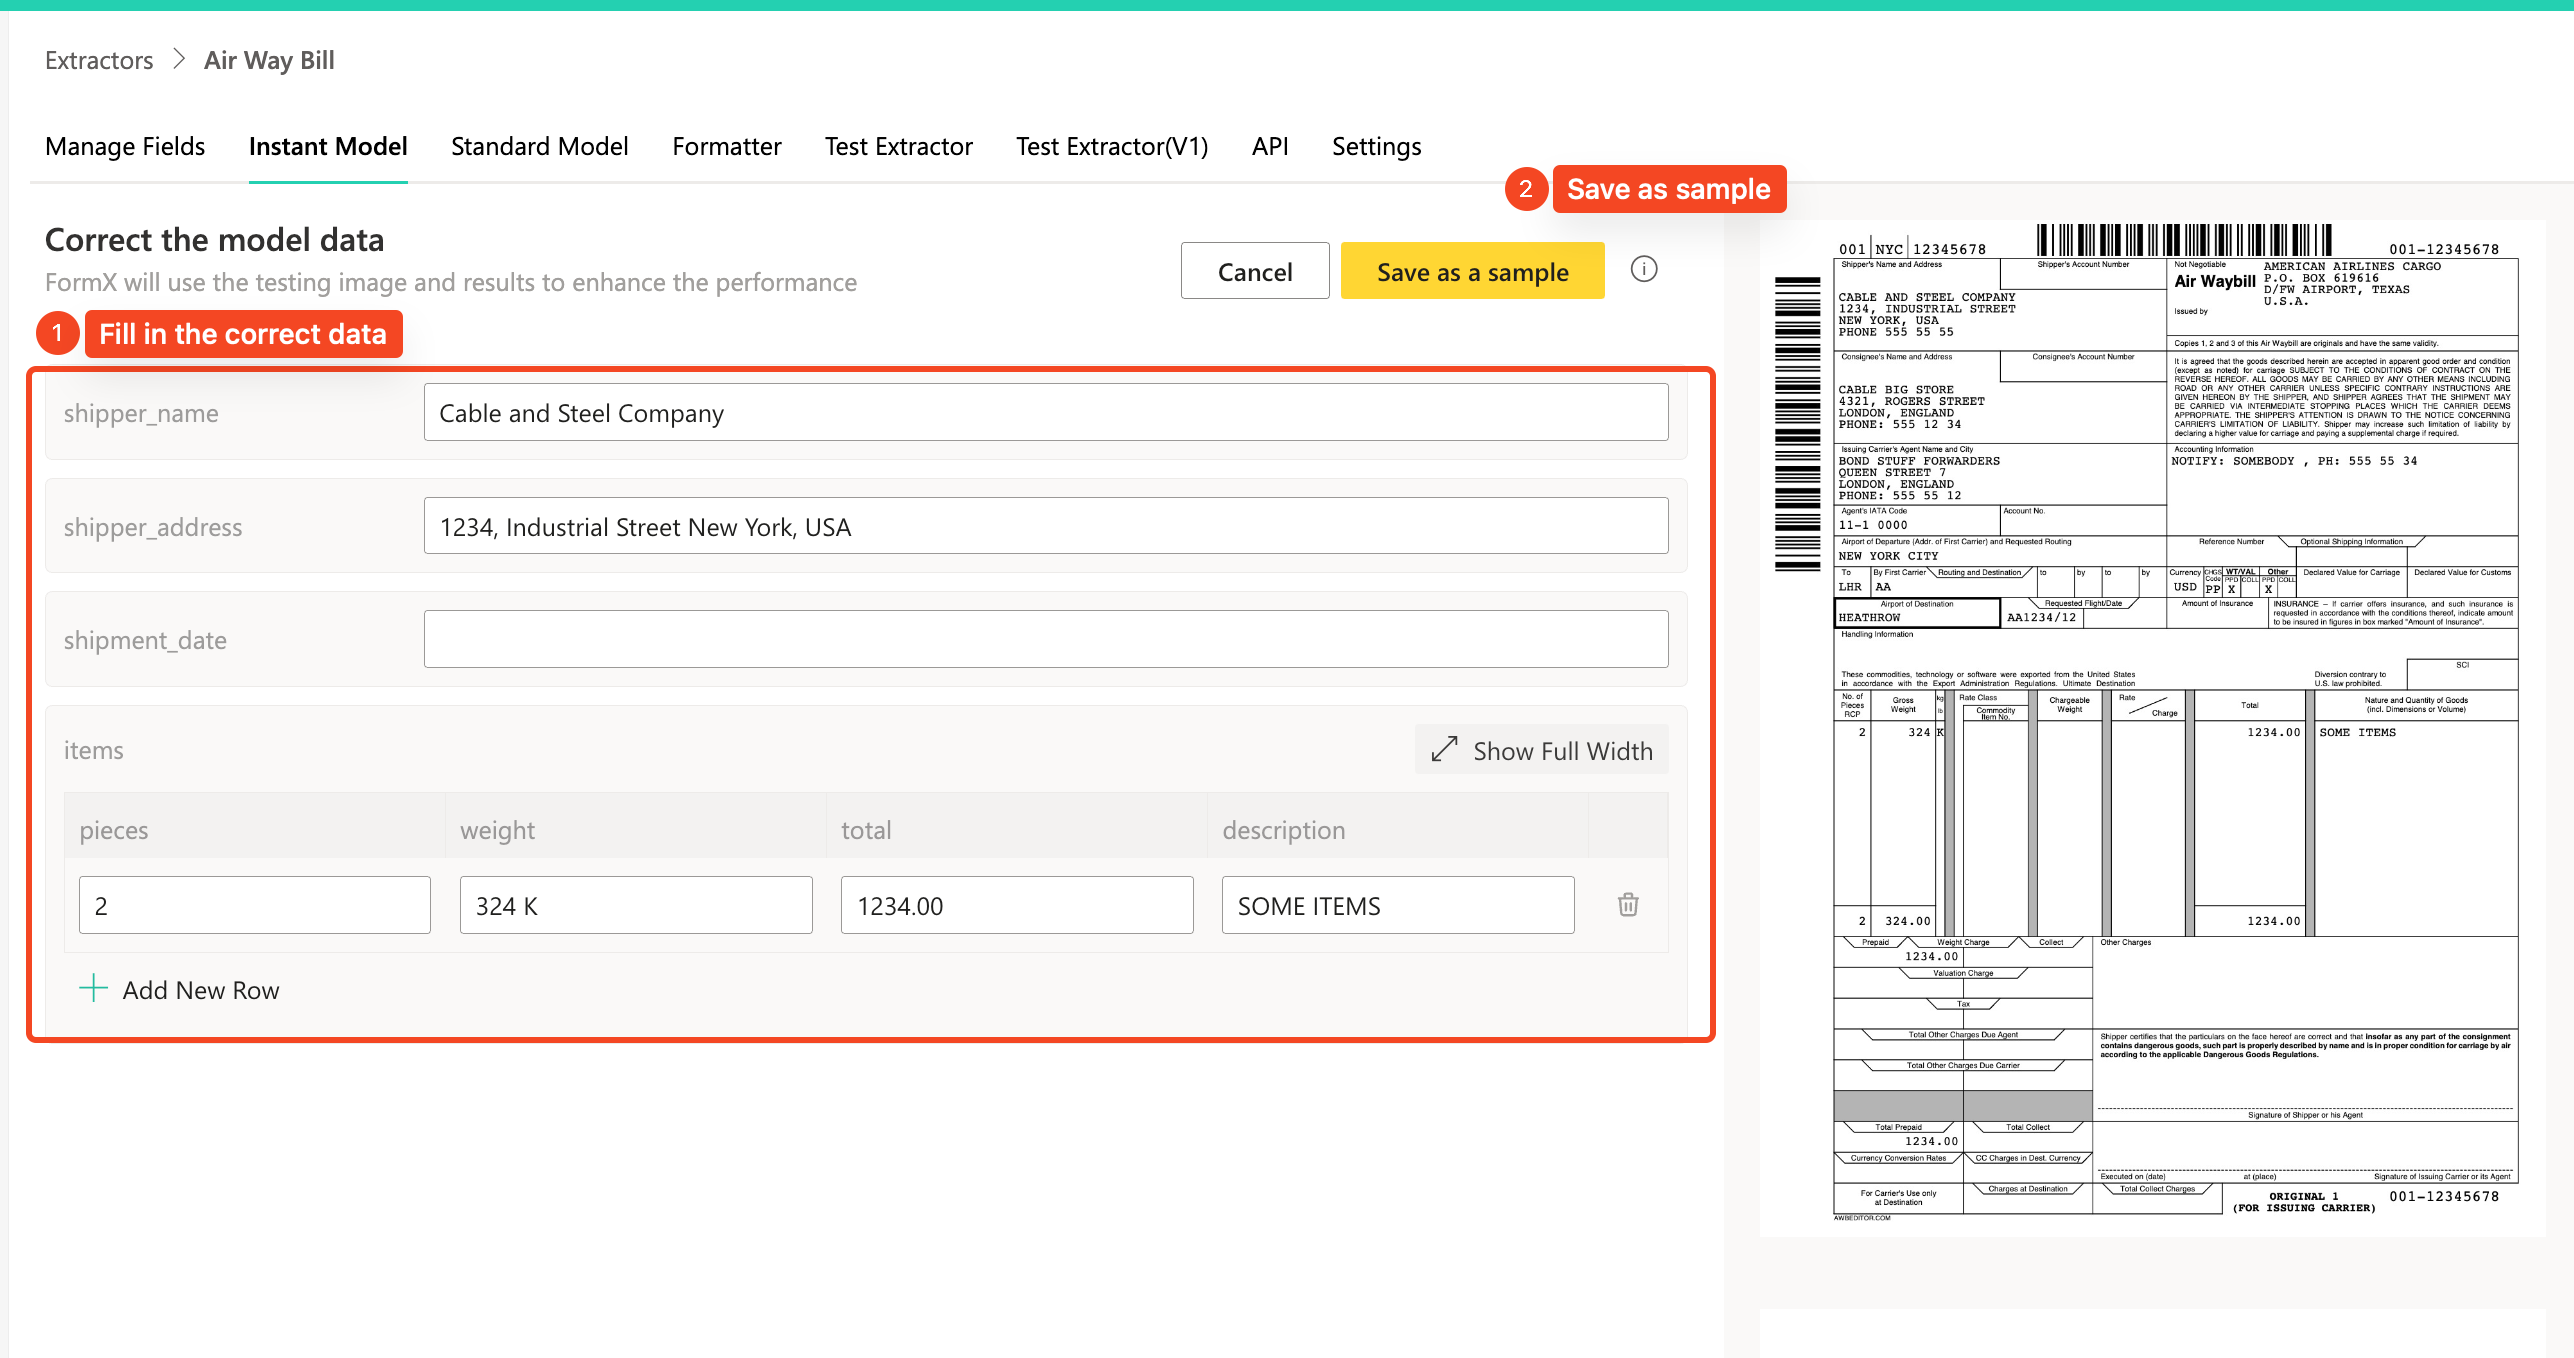
After uploading the 1st sample, you will see the extracted result. If there are errors in the data, select "Correct the data" to train the model.
Fill in the correct data and save it as sample.
You are now back to the sample list screen and you can upload the 2nd sample for testing.
Repeat the steps until you are satisfied with the result of the extraction.
Step 3. Use the Custom Model Extractor:
Once you have uploaded a sample and if the extraction results appear satisfactory, you can proceed by clicking "Yes, they look good" to exit the review process.
Congratulations! Your custom model extractor is now ready to be used. You can:
- Further test the model's performance in the "Test" tab, or
- Explore how to seamlessly integrate the custom model extractor into your applications through the "Extract" tab.
Use "Standard Model" if 3 samples is not enough.
If inaccuracies continue to persist even after adding three samples, don't worry! FormX will guide you through the process of providing additional samples to further enhance the extraction results.
- Switch to "Standard Model"
- Upload ten additional samples and label the fields on each sample.
- Then initialize training and wait for the model to be ready for testing.

If you are still not quite getting what you expect, our team is always here to help. Email us at [email protected].
Tips for Sample Preparation
To achieve accurate extraction results, follow these sample preparation guidelines:
- Capture documents in a well-lit environment.
- Keep the camera steady for clear images.
- Ensure legible text on the document.
- Avoid using images downloaded from search engines, fake samples, and blurry or low-quality images, as these can negatively impact the model's accuracy.
You now have the knowledge to create and set up a custom model extractor using FormX.
Updated about 2 months ago