Zapier Trigger Tutorial
When to use
If you wish to import files to FormX workspace and send the extraction result automatically to a 3rd party tool (e.g. Google Spreadsheet, One Drive and such)
Get it here.
Prerequisite
- Create a FormX extractor and a respective workspace.
- Prepare a Google Spreadsheet with all columns well defined. Get started with this template.
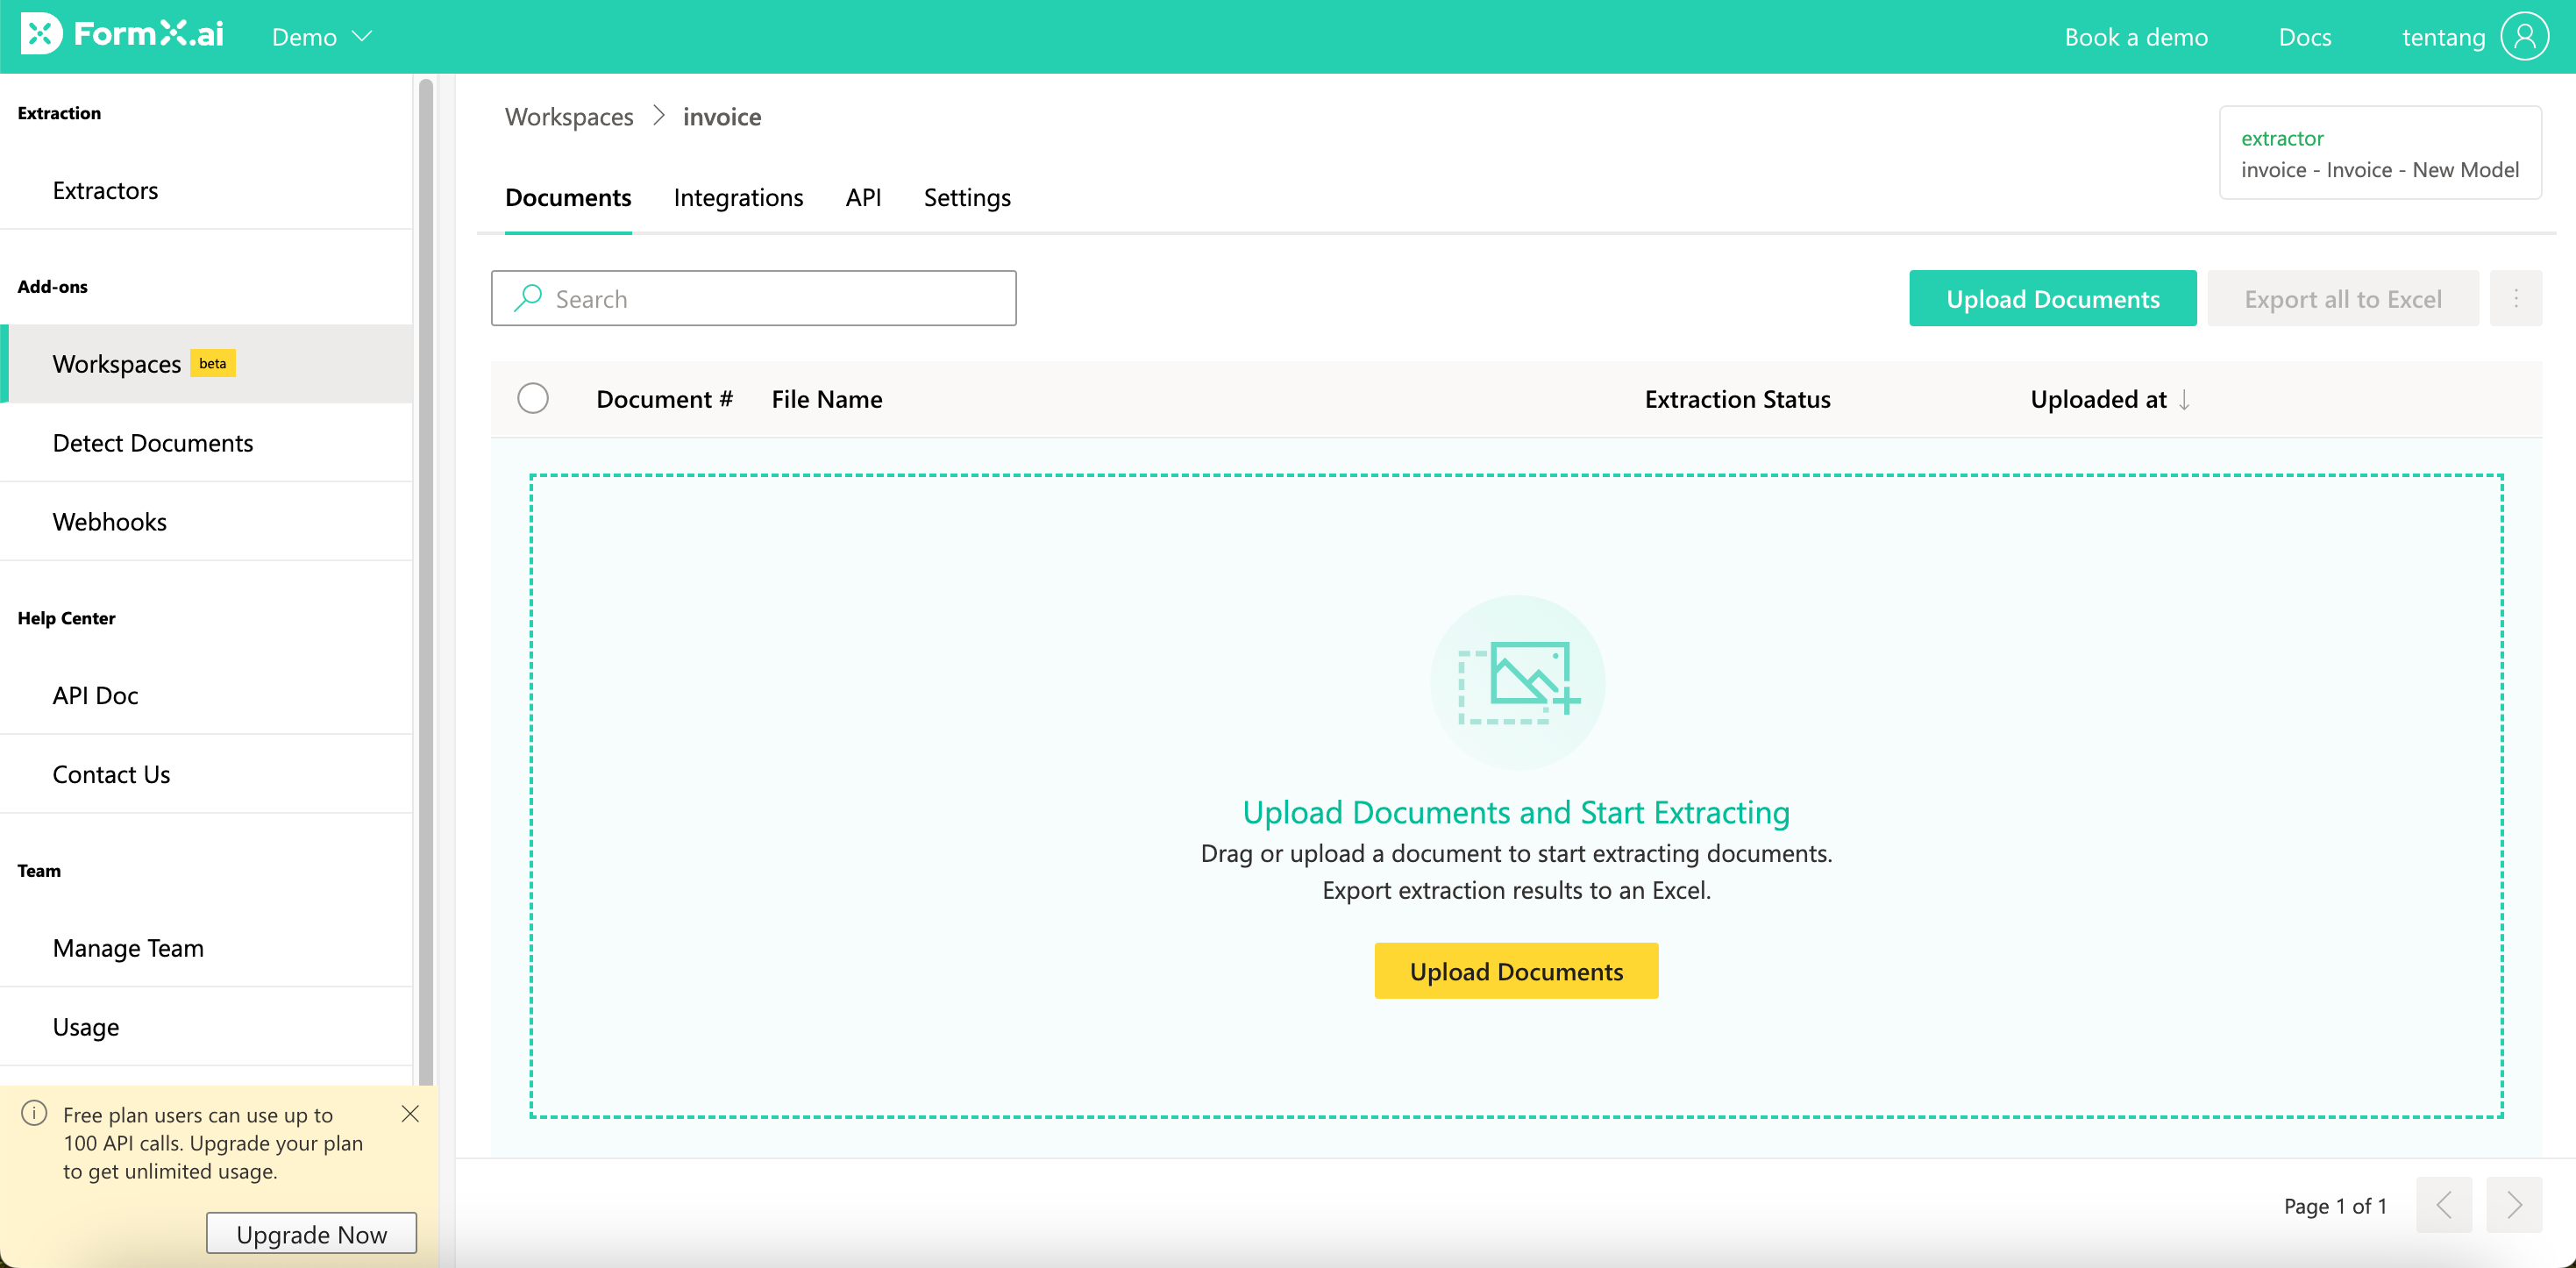
Step 1: Create a FormX extractor and a respective workspace
Log in to your FormX account and create a new extractor. This extractor allow you to extract document data of the type you choose like invoice, resume, etc.
Then, go to workspace. Create a workspace that links to the extractor. Workspace is where FormX will bulk process your files. You can either drag and drop the files to the workspace or upload the files via the /v2/workspace API.
Different from our /v2/extract API, when /v2/workspace is called, FormX will store the files you upload and you will be able to view them in the workspace portal.
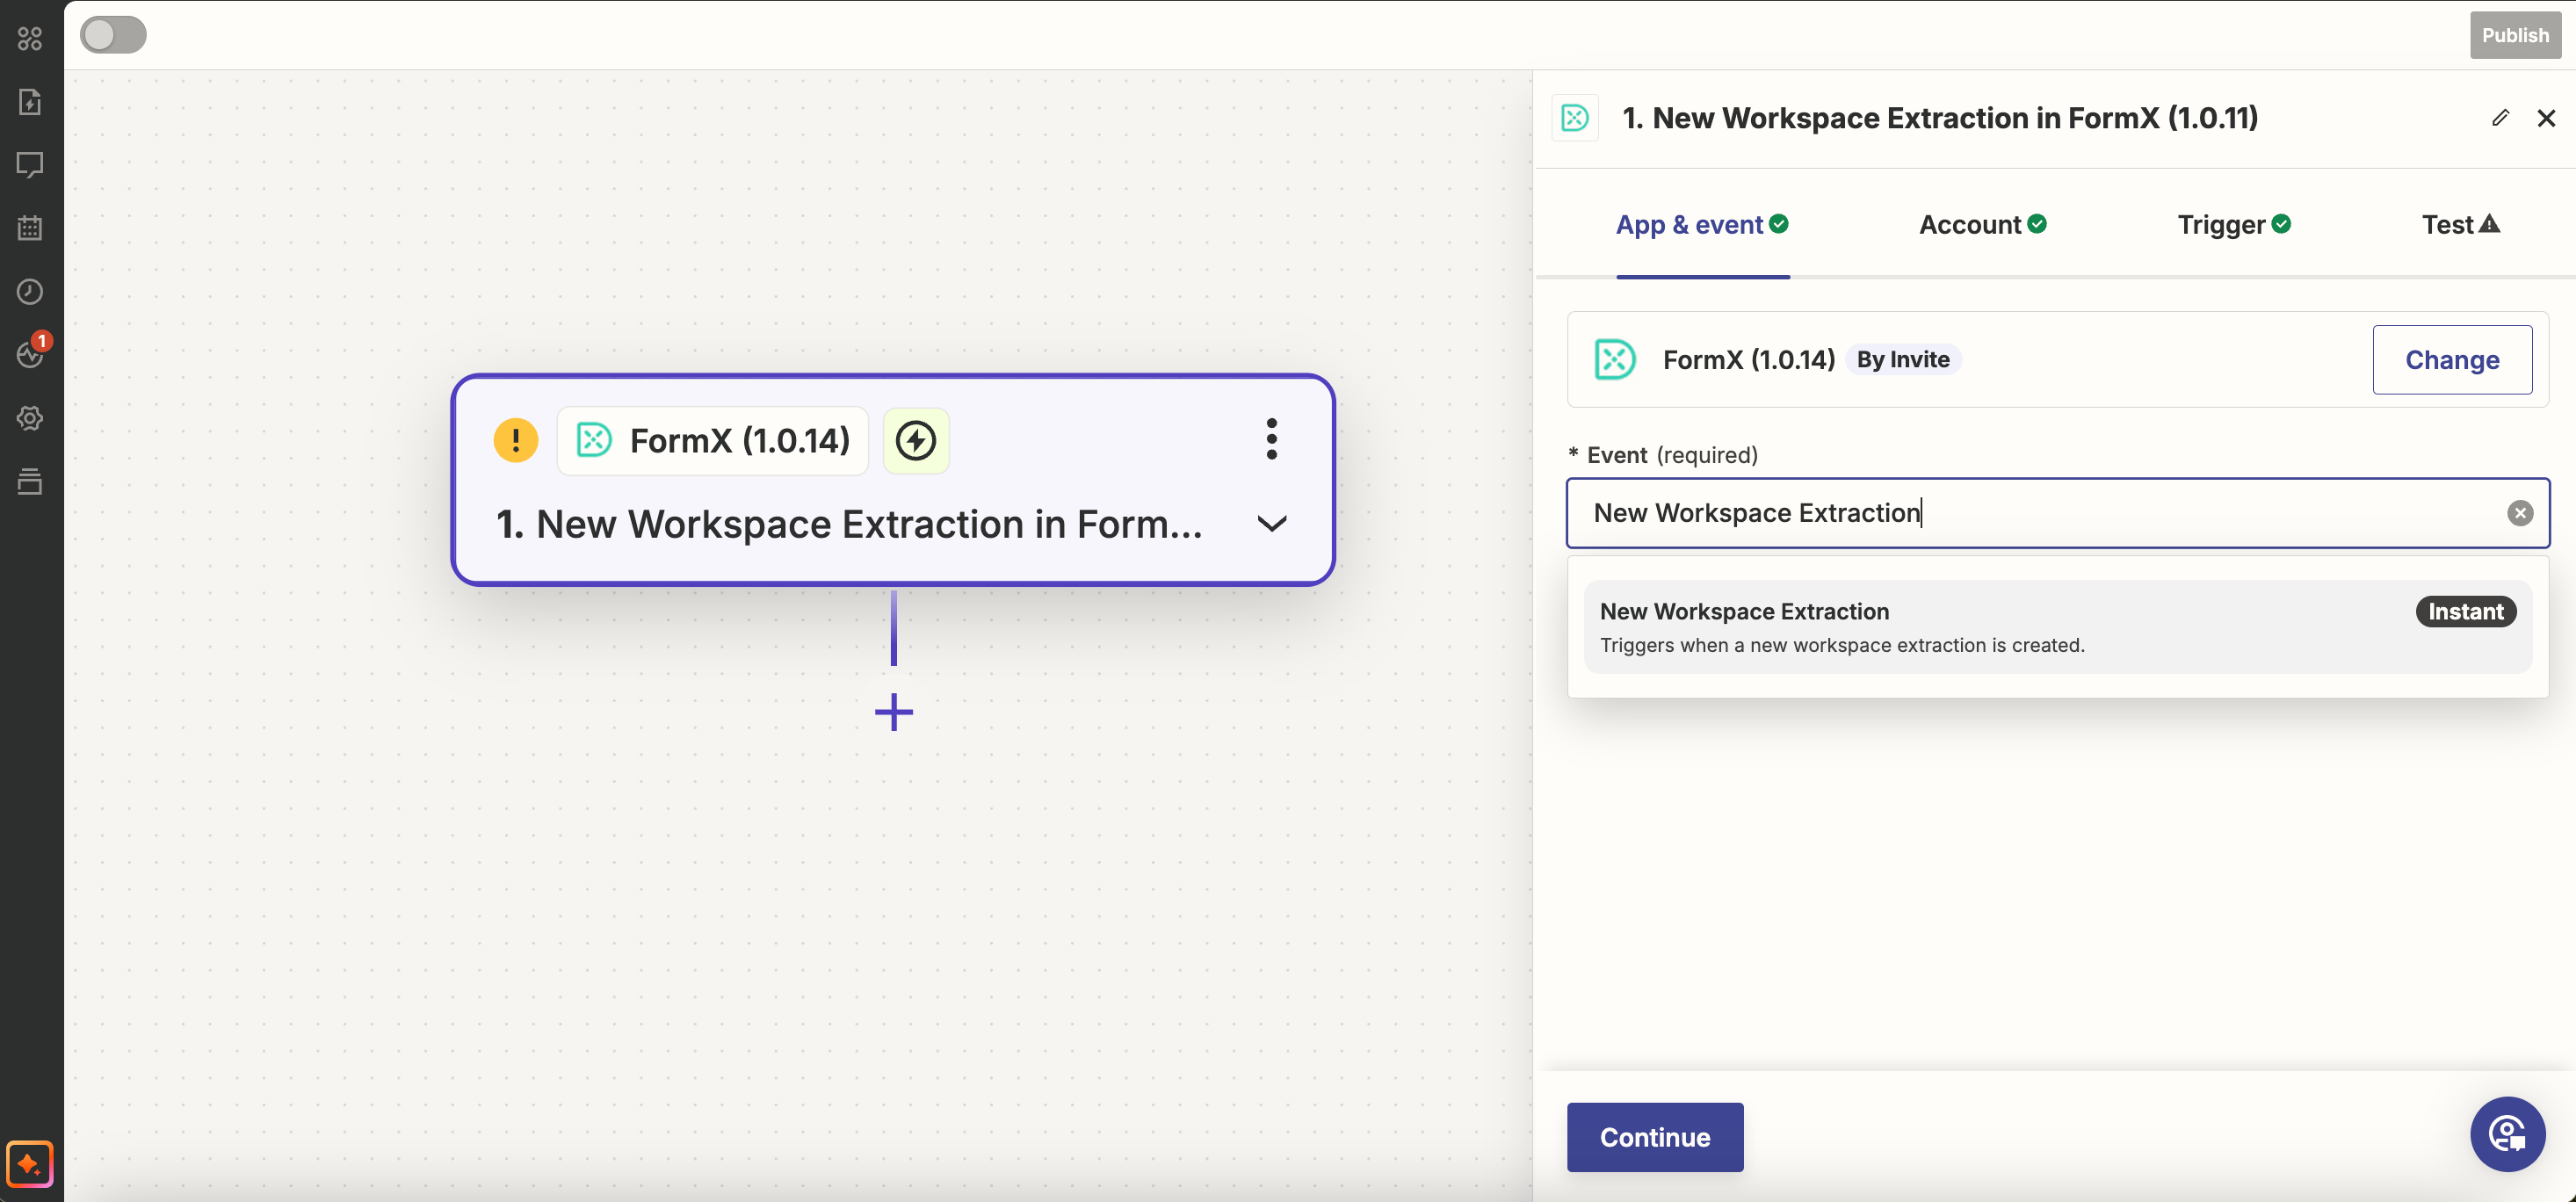
Step 2: Add a Zapier FormX trigger app
Now go to Zapier, create a new Zap.
Add FormX to the trigger step. Select 'New workspace extraction' as the event.
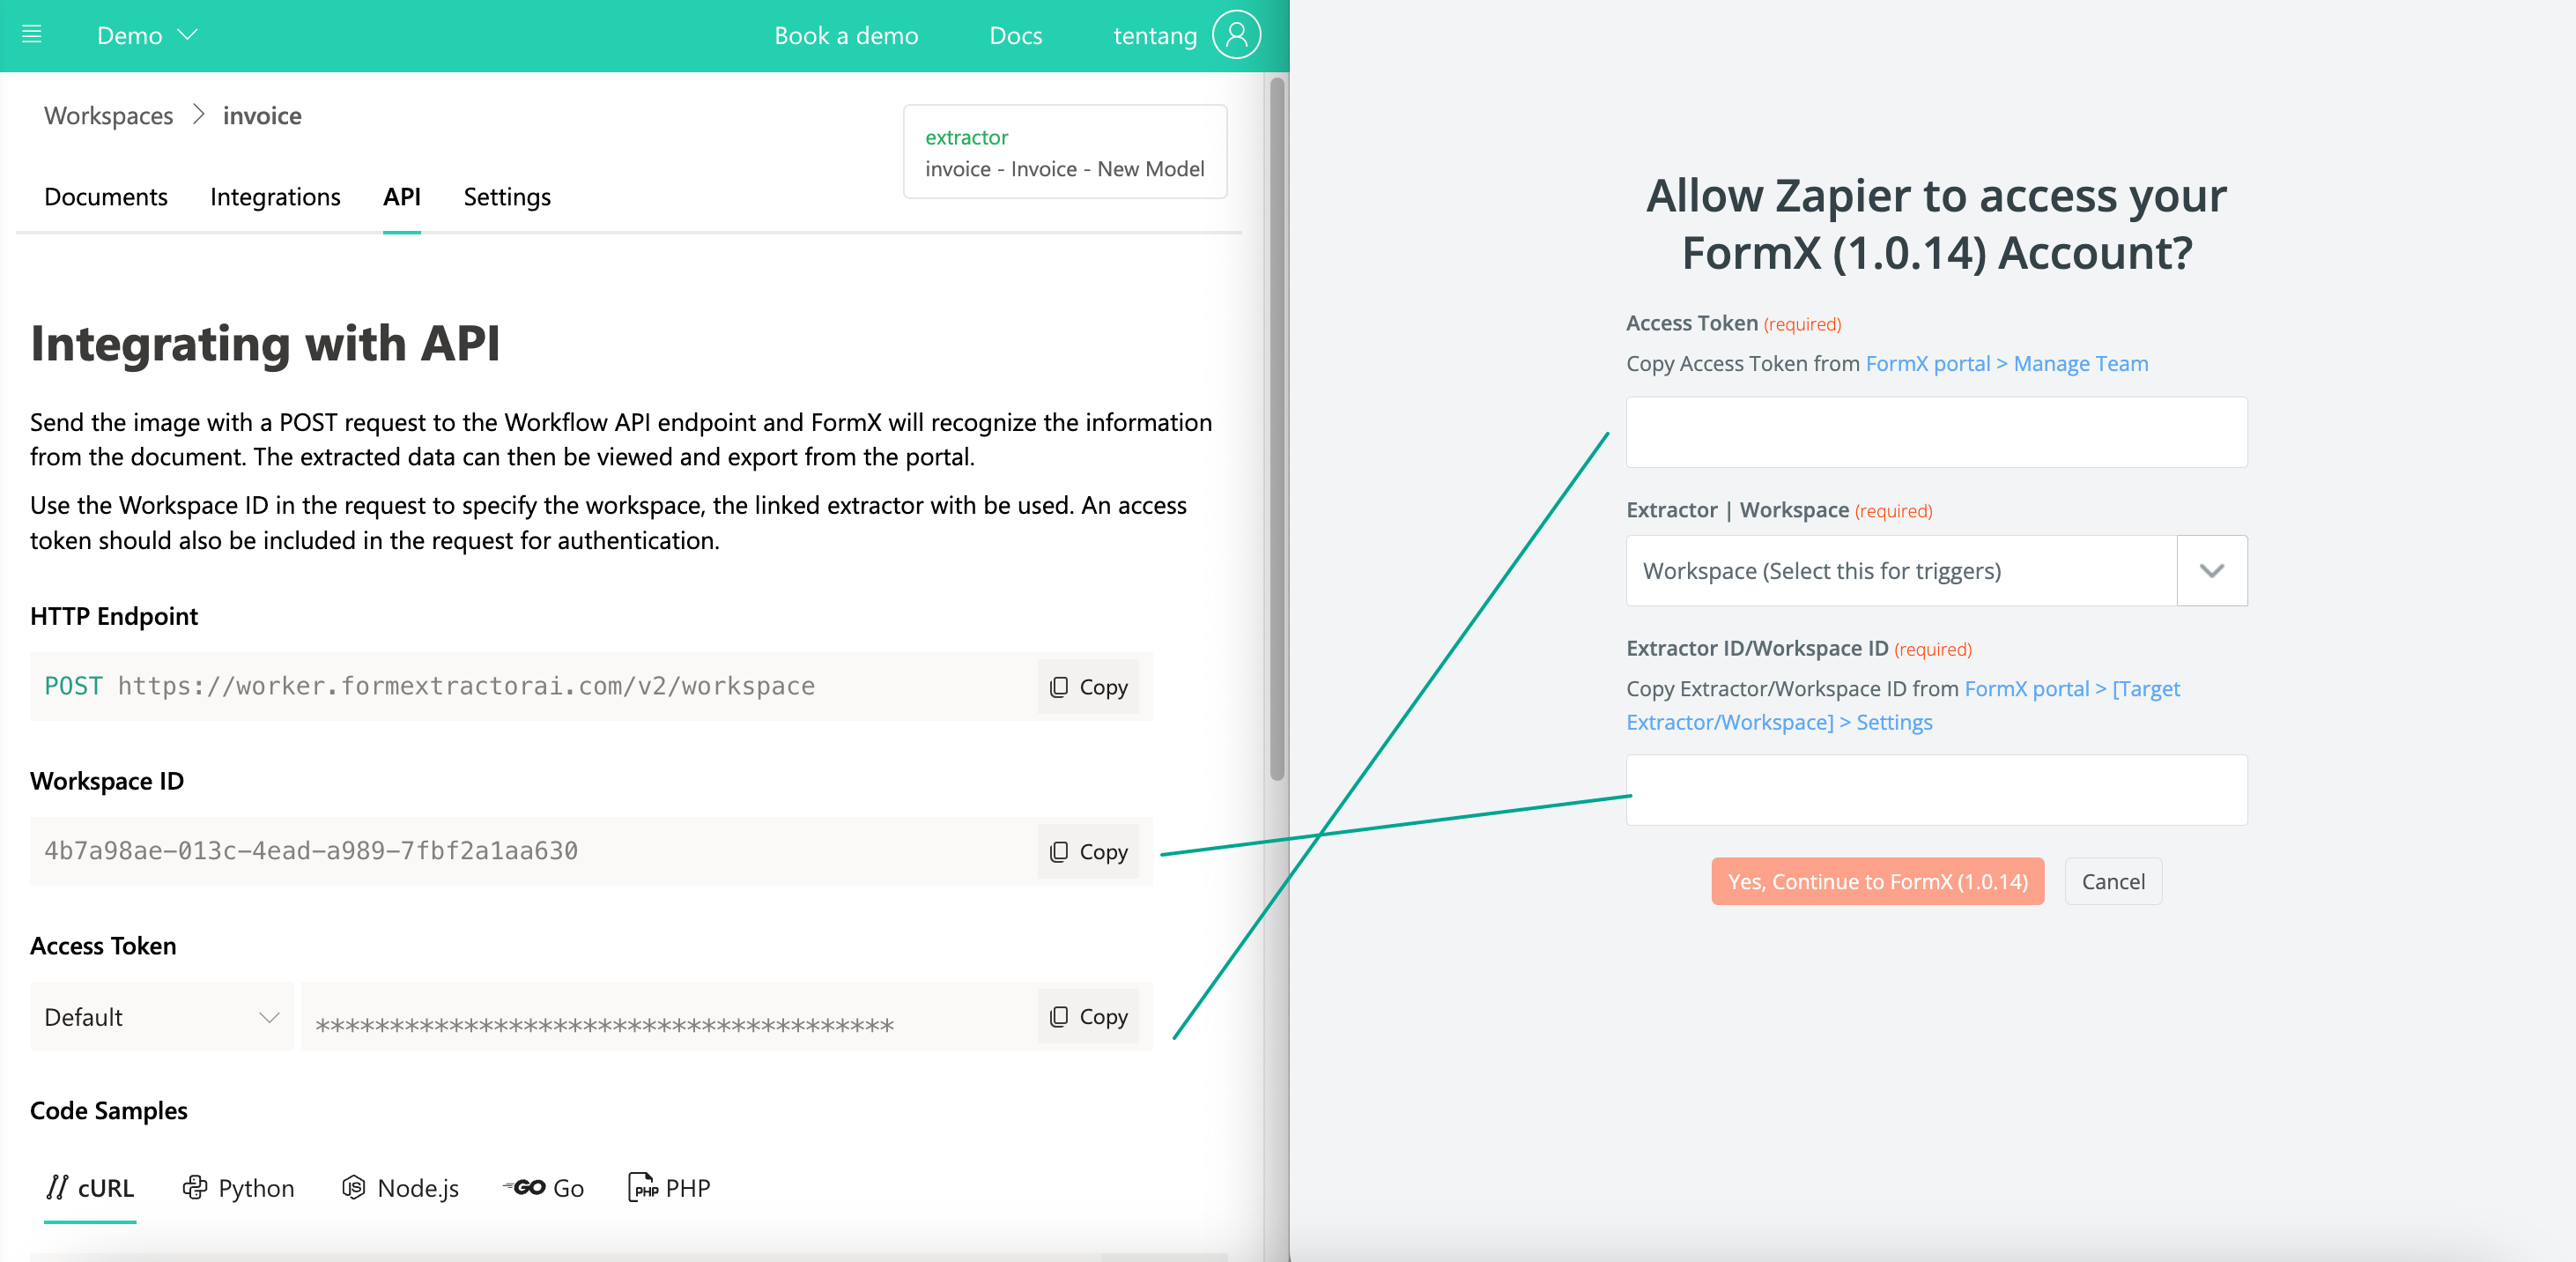
Step 3: Connect to your FormX Workspace
Next, go to the Account tab and configure the app with your FormX credentials:
- Access token: Get it in the API tab of your workspace
- Extractor or Workspace: Select Workspace
- Extractor id / workspace id: Enter the workspace id, get it in the API tab of your workspace.
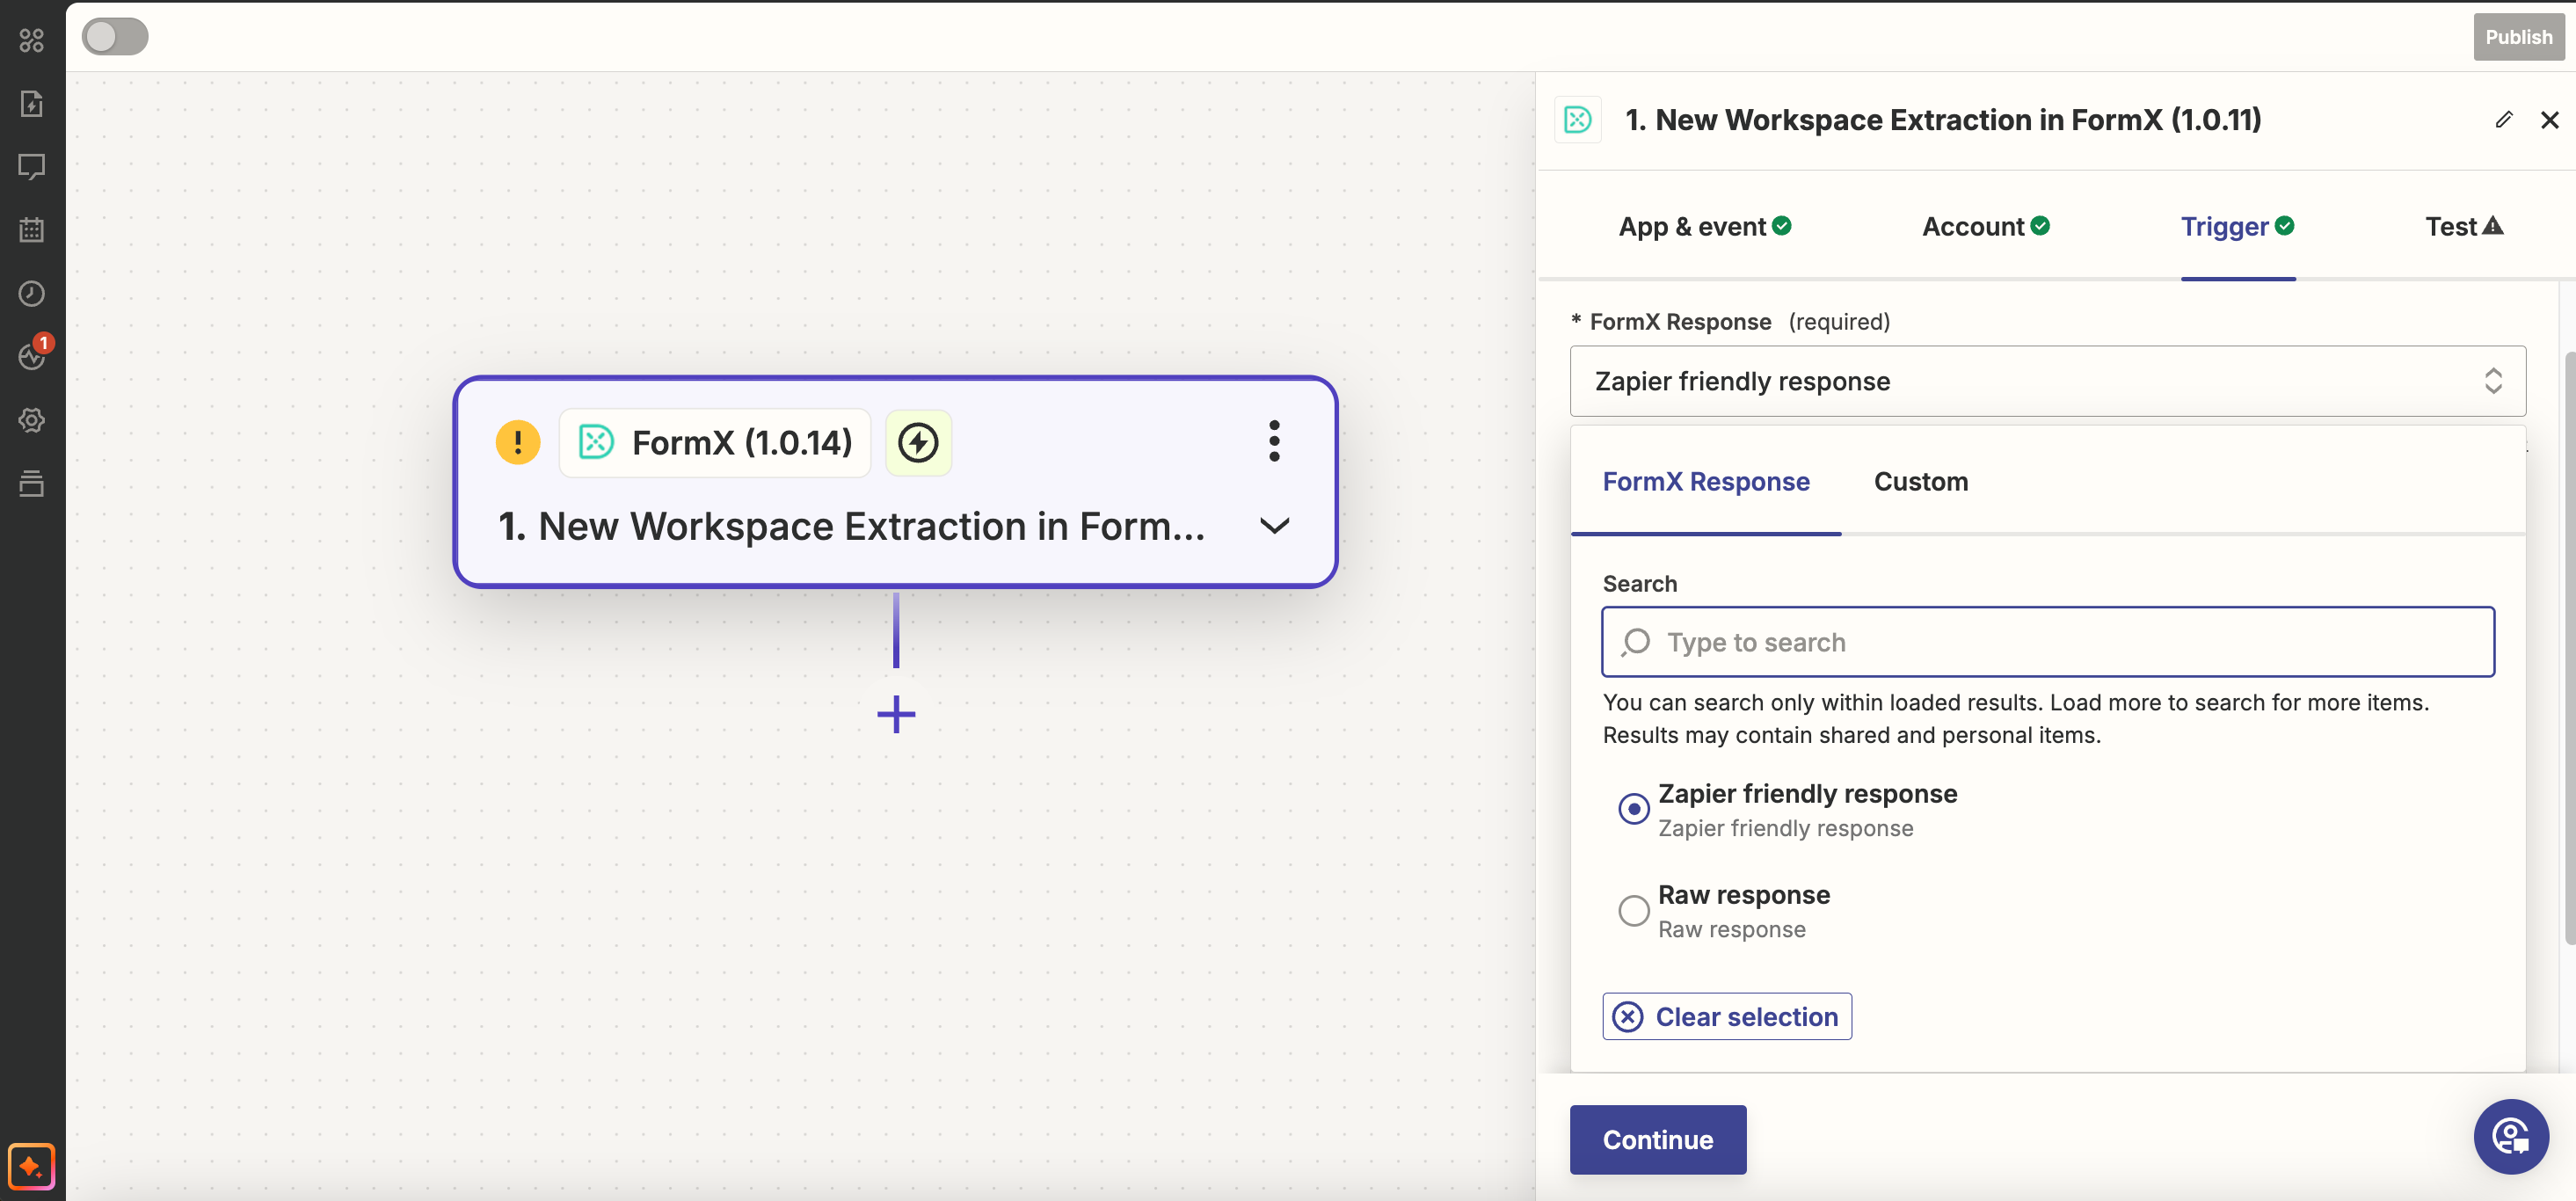
Step 4: Configure the FormX workspace app
Now, go to the Action tab and configure the FormX workspace app. Select the type of response you wish to get.
- FormX response: Two options are provided - transformed response and raw response.
- Zapier-friendly response: It's provided for a simpler Zapier integration set up. If you are always uploading just one single file, especially the file contains line items, use transformed response.
- Raw response: If you need more control over the integration, select raw response. Please note that you may need to add additional Zapier apps to break down or format the raw response before sending it to a spreadsheet (or any destination).
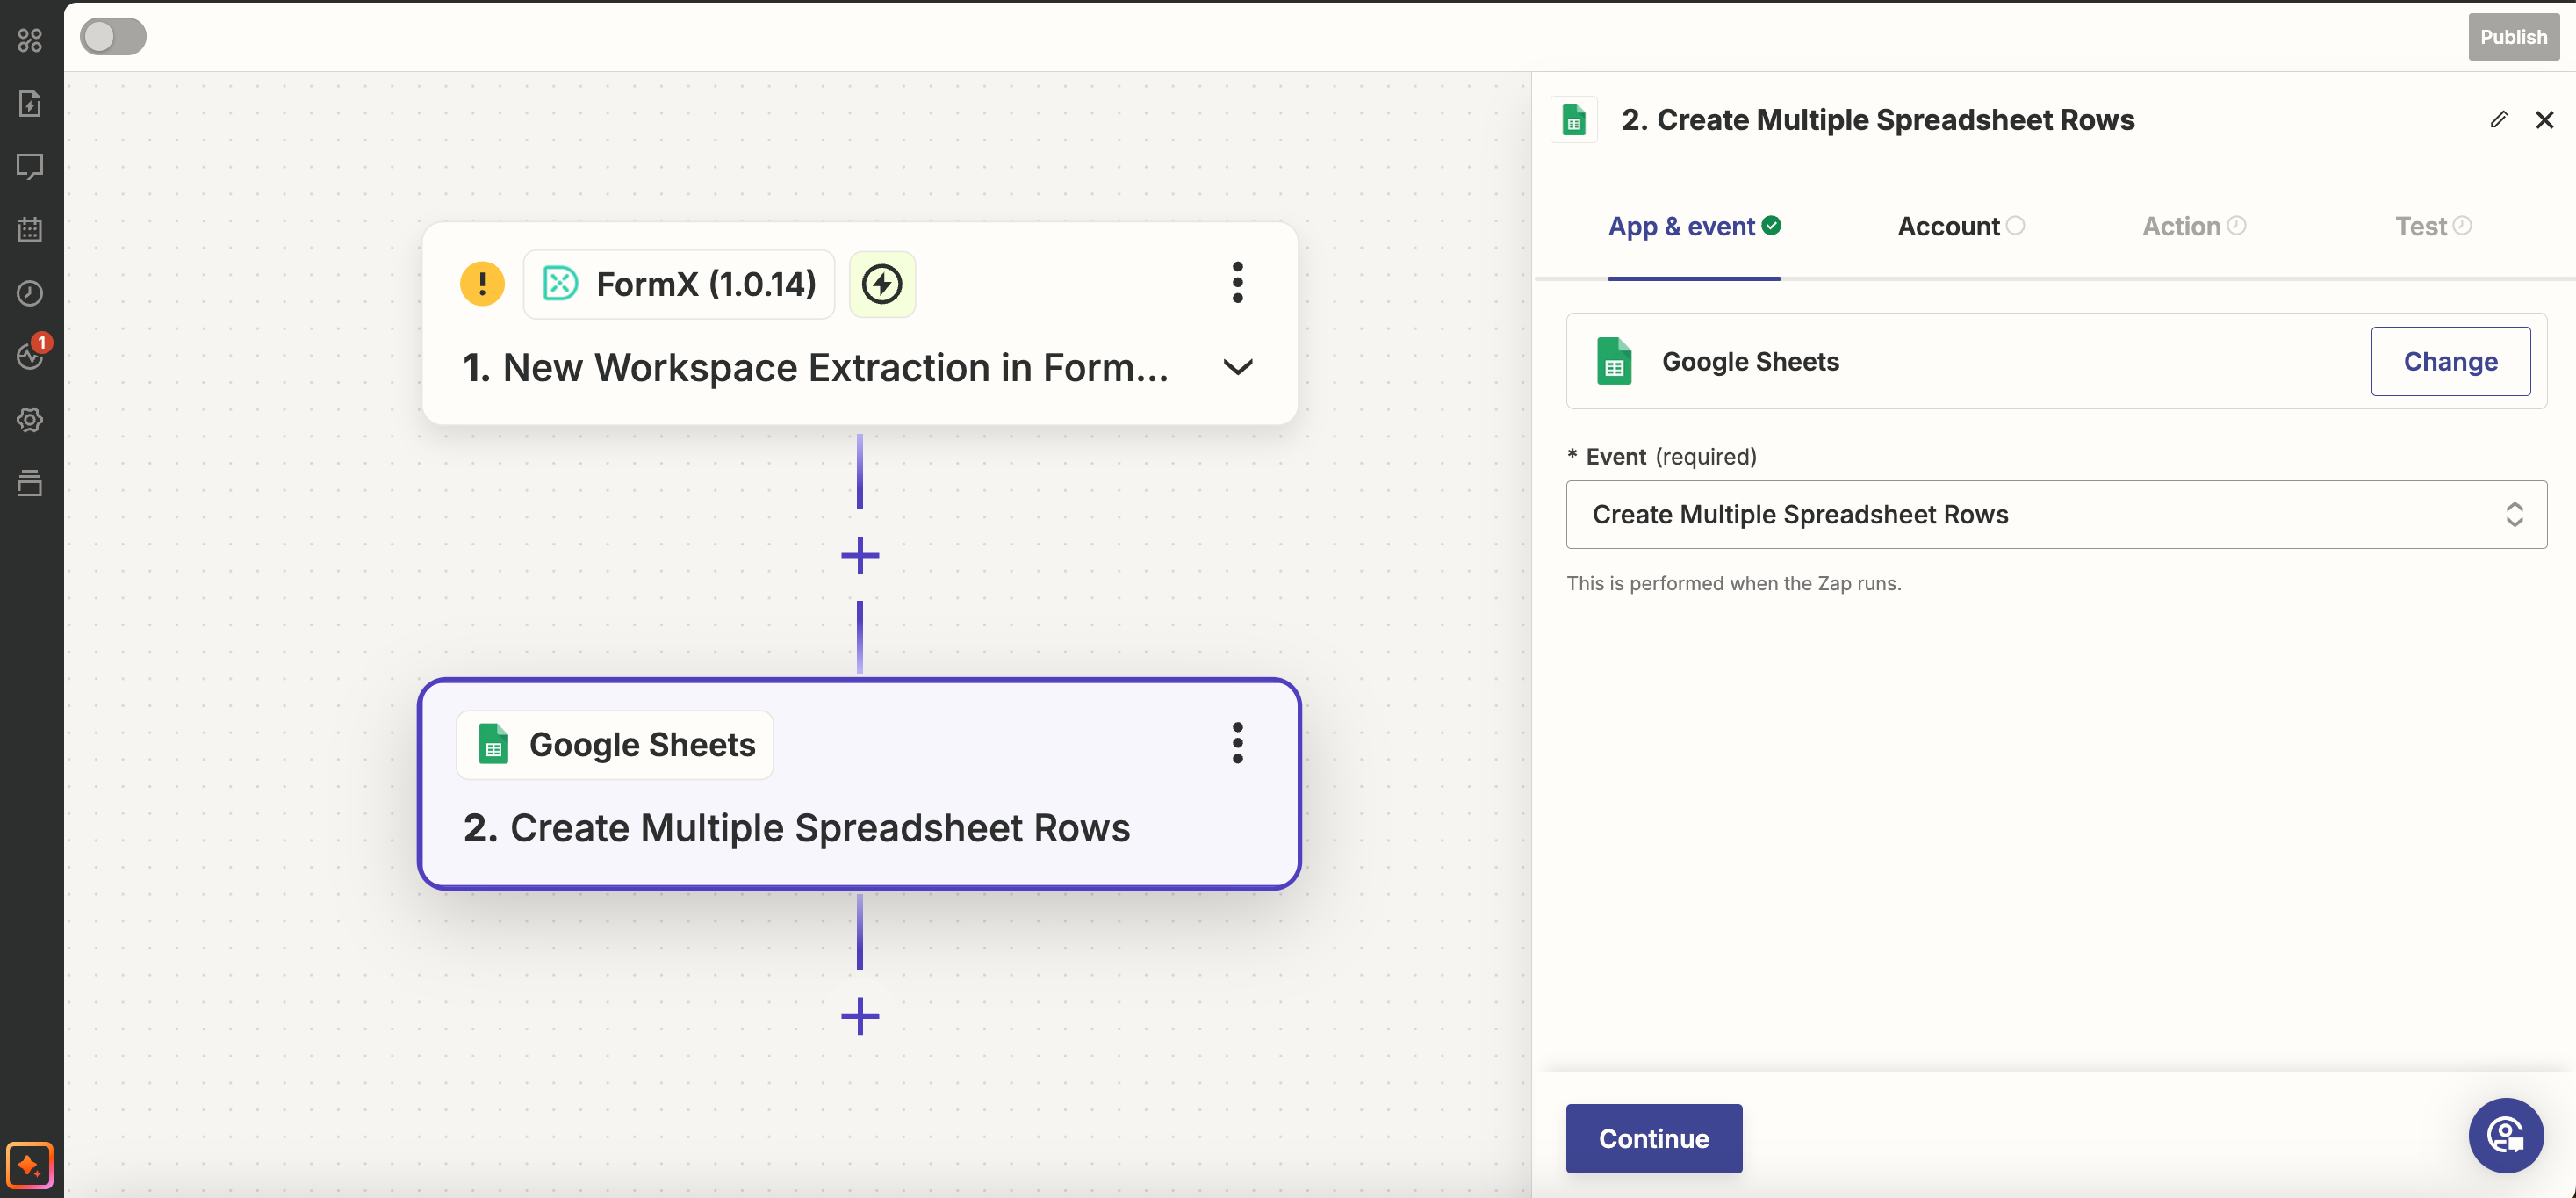
Step 5: Write the extracted data to a Google spreadsheet
Now, we are ready to print the extraction result to a Google Spreadsheet.
Search and add a Google Sheet step.
Depending on your file extraction pipeline, select the event that best works for you. In our example, as we are processing invoices and invoices usually contain multiple line items, we'll select event 'Create Mulitple Spreadsheet Row'
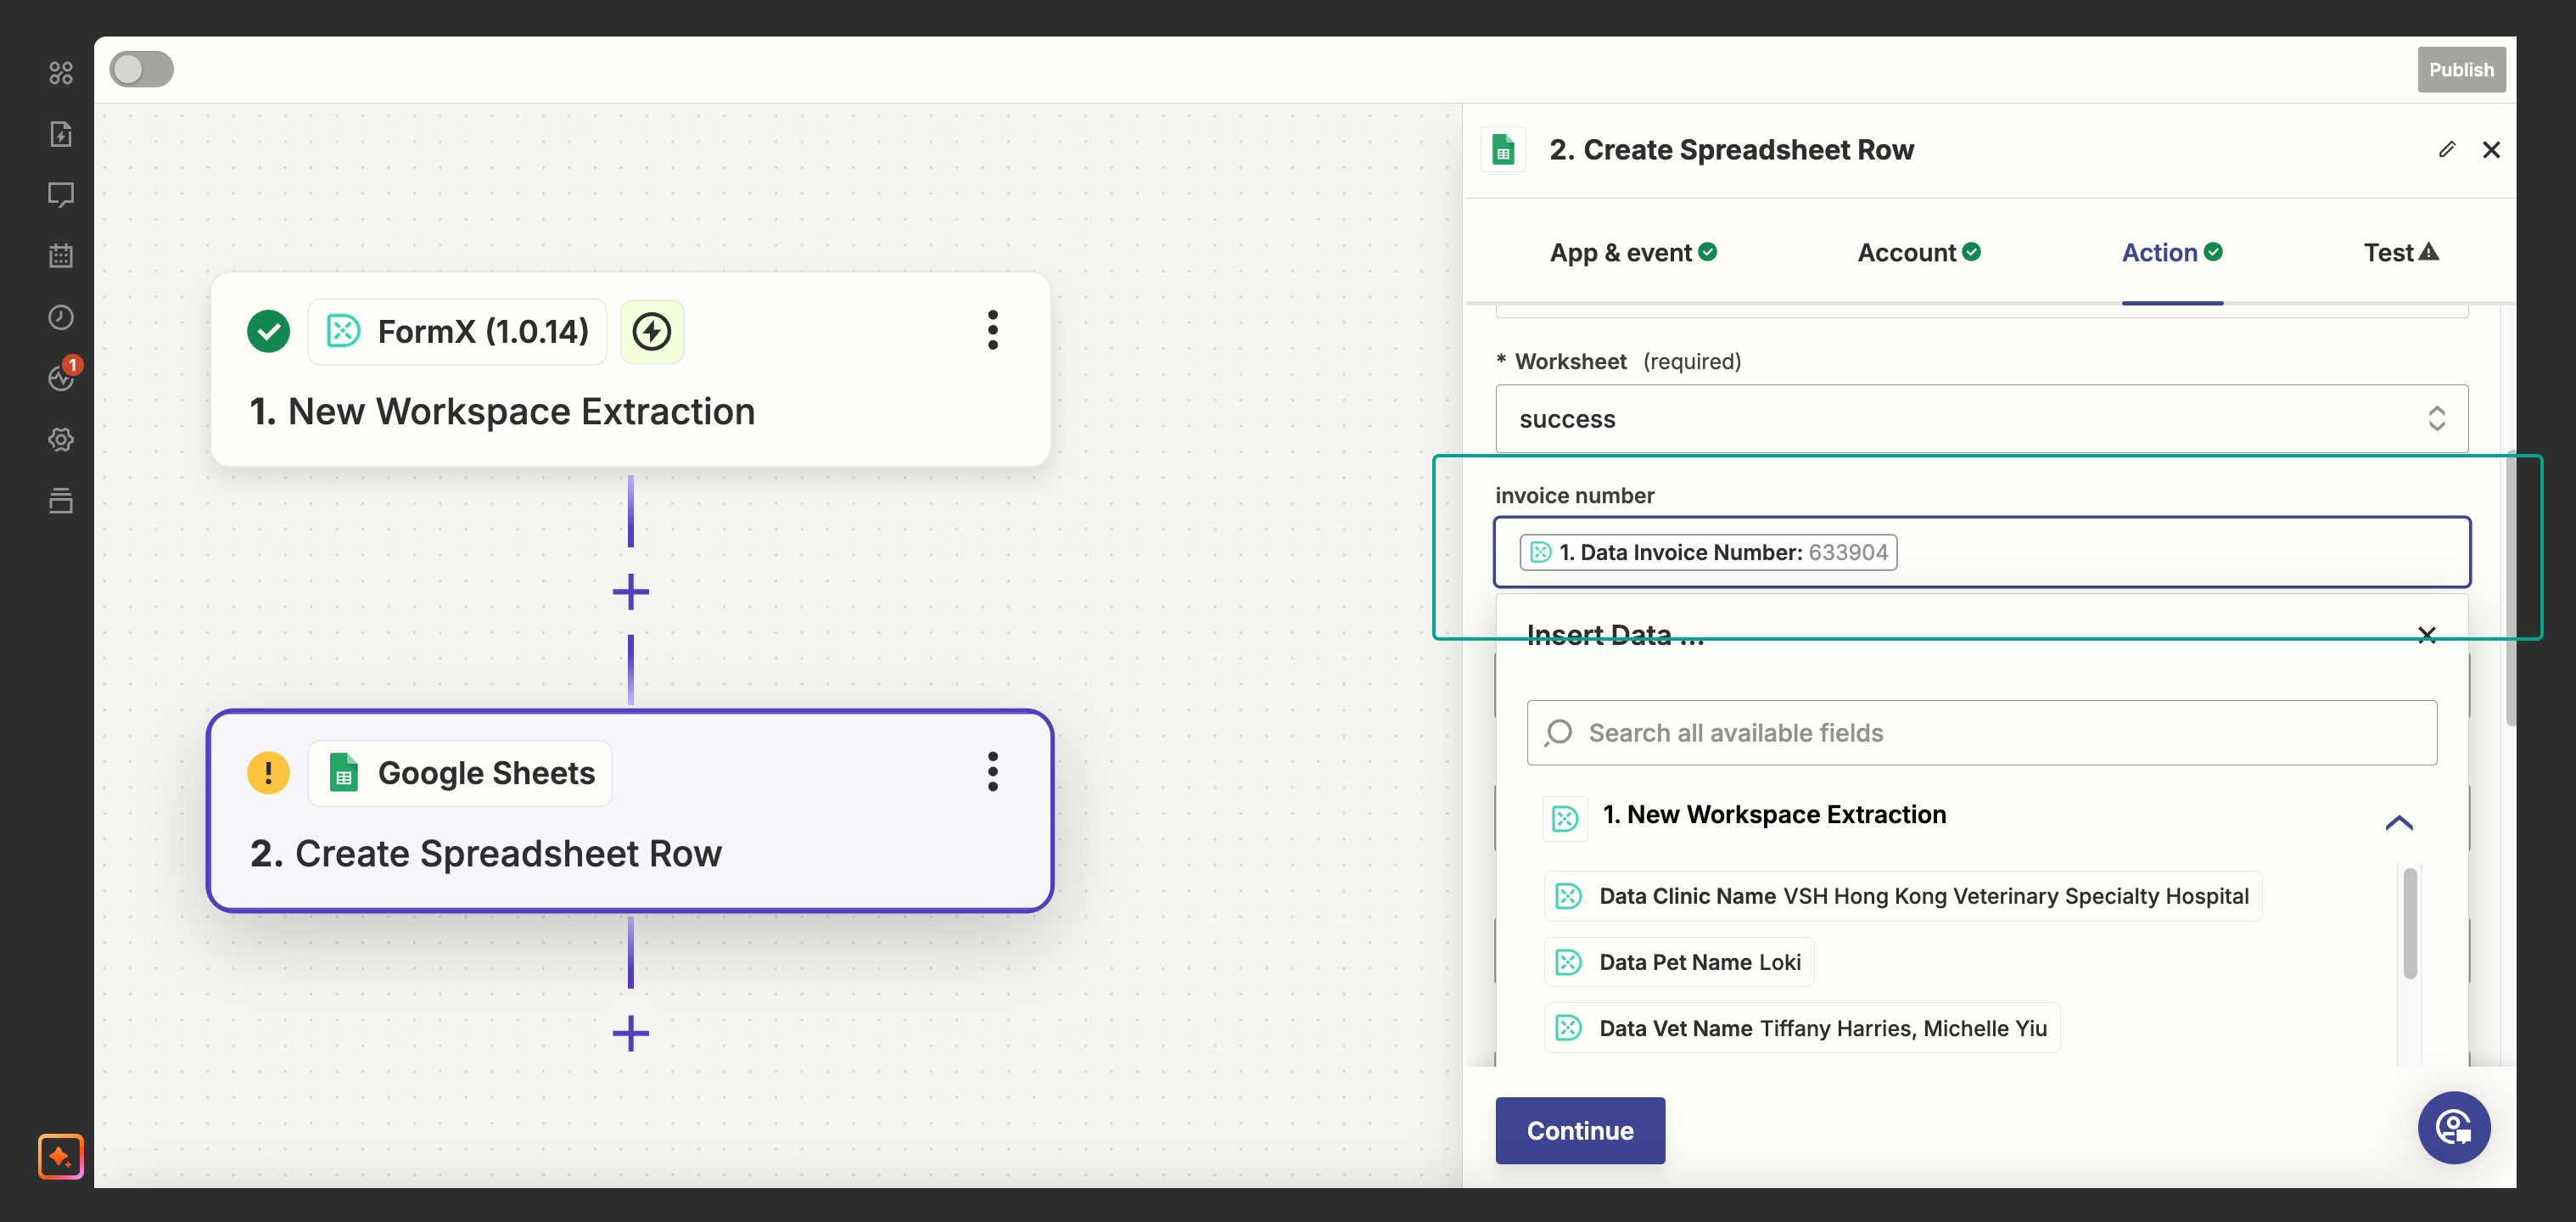
Once you've provided the details of the Google Spreadsheet, Zapier will fetch the header of your spreadsheet automatically and you may start working on the data mapping.
Select the respective FormX data field to add to a Google Spreadsheet column.
That's it. You are good to go. Test your Zap as per Zapier instructions.
(Bonus) Step 6: Handle extraction error
The steps we've covered so far will perfectly handle successful extraction result. However, you may wonder what happened if there's a FormX extraction error.
Depending how you'd like to handle error results, here's the 2 suggested ways to do it:
- filter out error result so it'll never be printed on your spreadsheet.
- handle success & error response separately (print them onto two separate tabs on a spreadsheet.)
Either way requires adding an additional Zapier step. Now add a step between Extract in FormX and Create Mulitple Spra
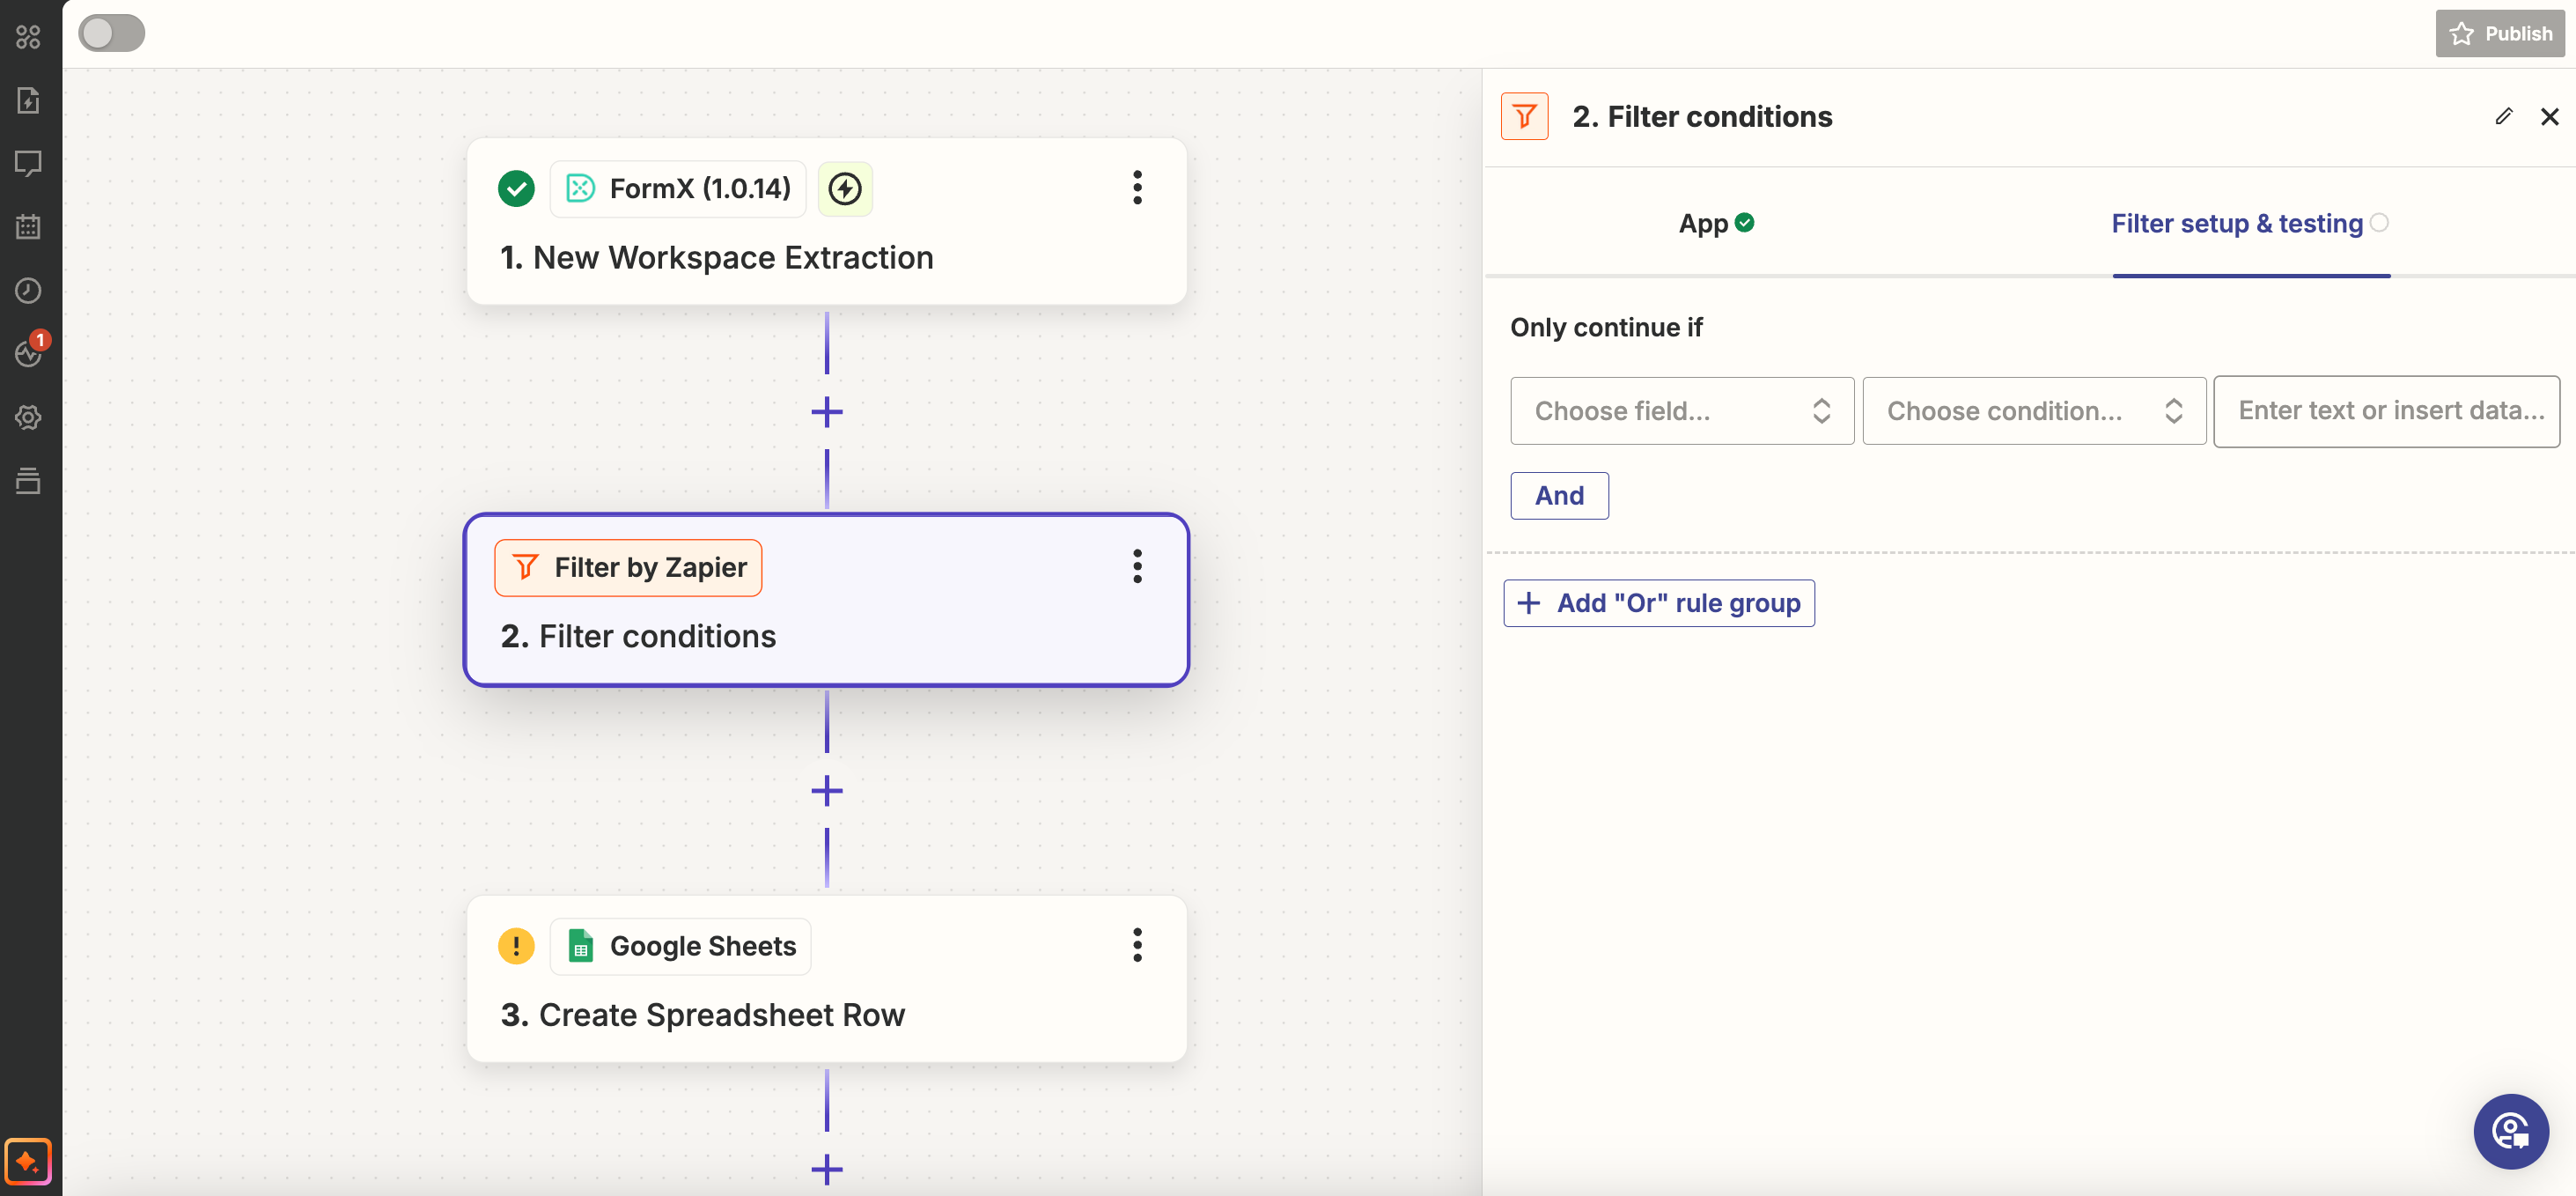
1. Filter out error result so it'll never be printed on your spreadsheet
Add a Filter by Zapier step. Add this condition - only continue if FormX response's status is ok.
In such way, only successful extraction will be processed.
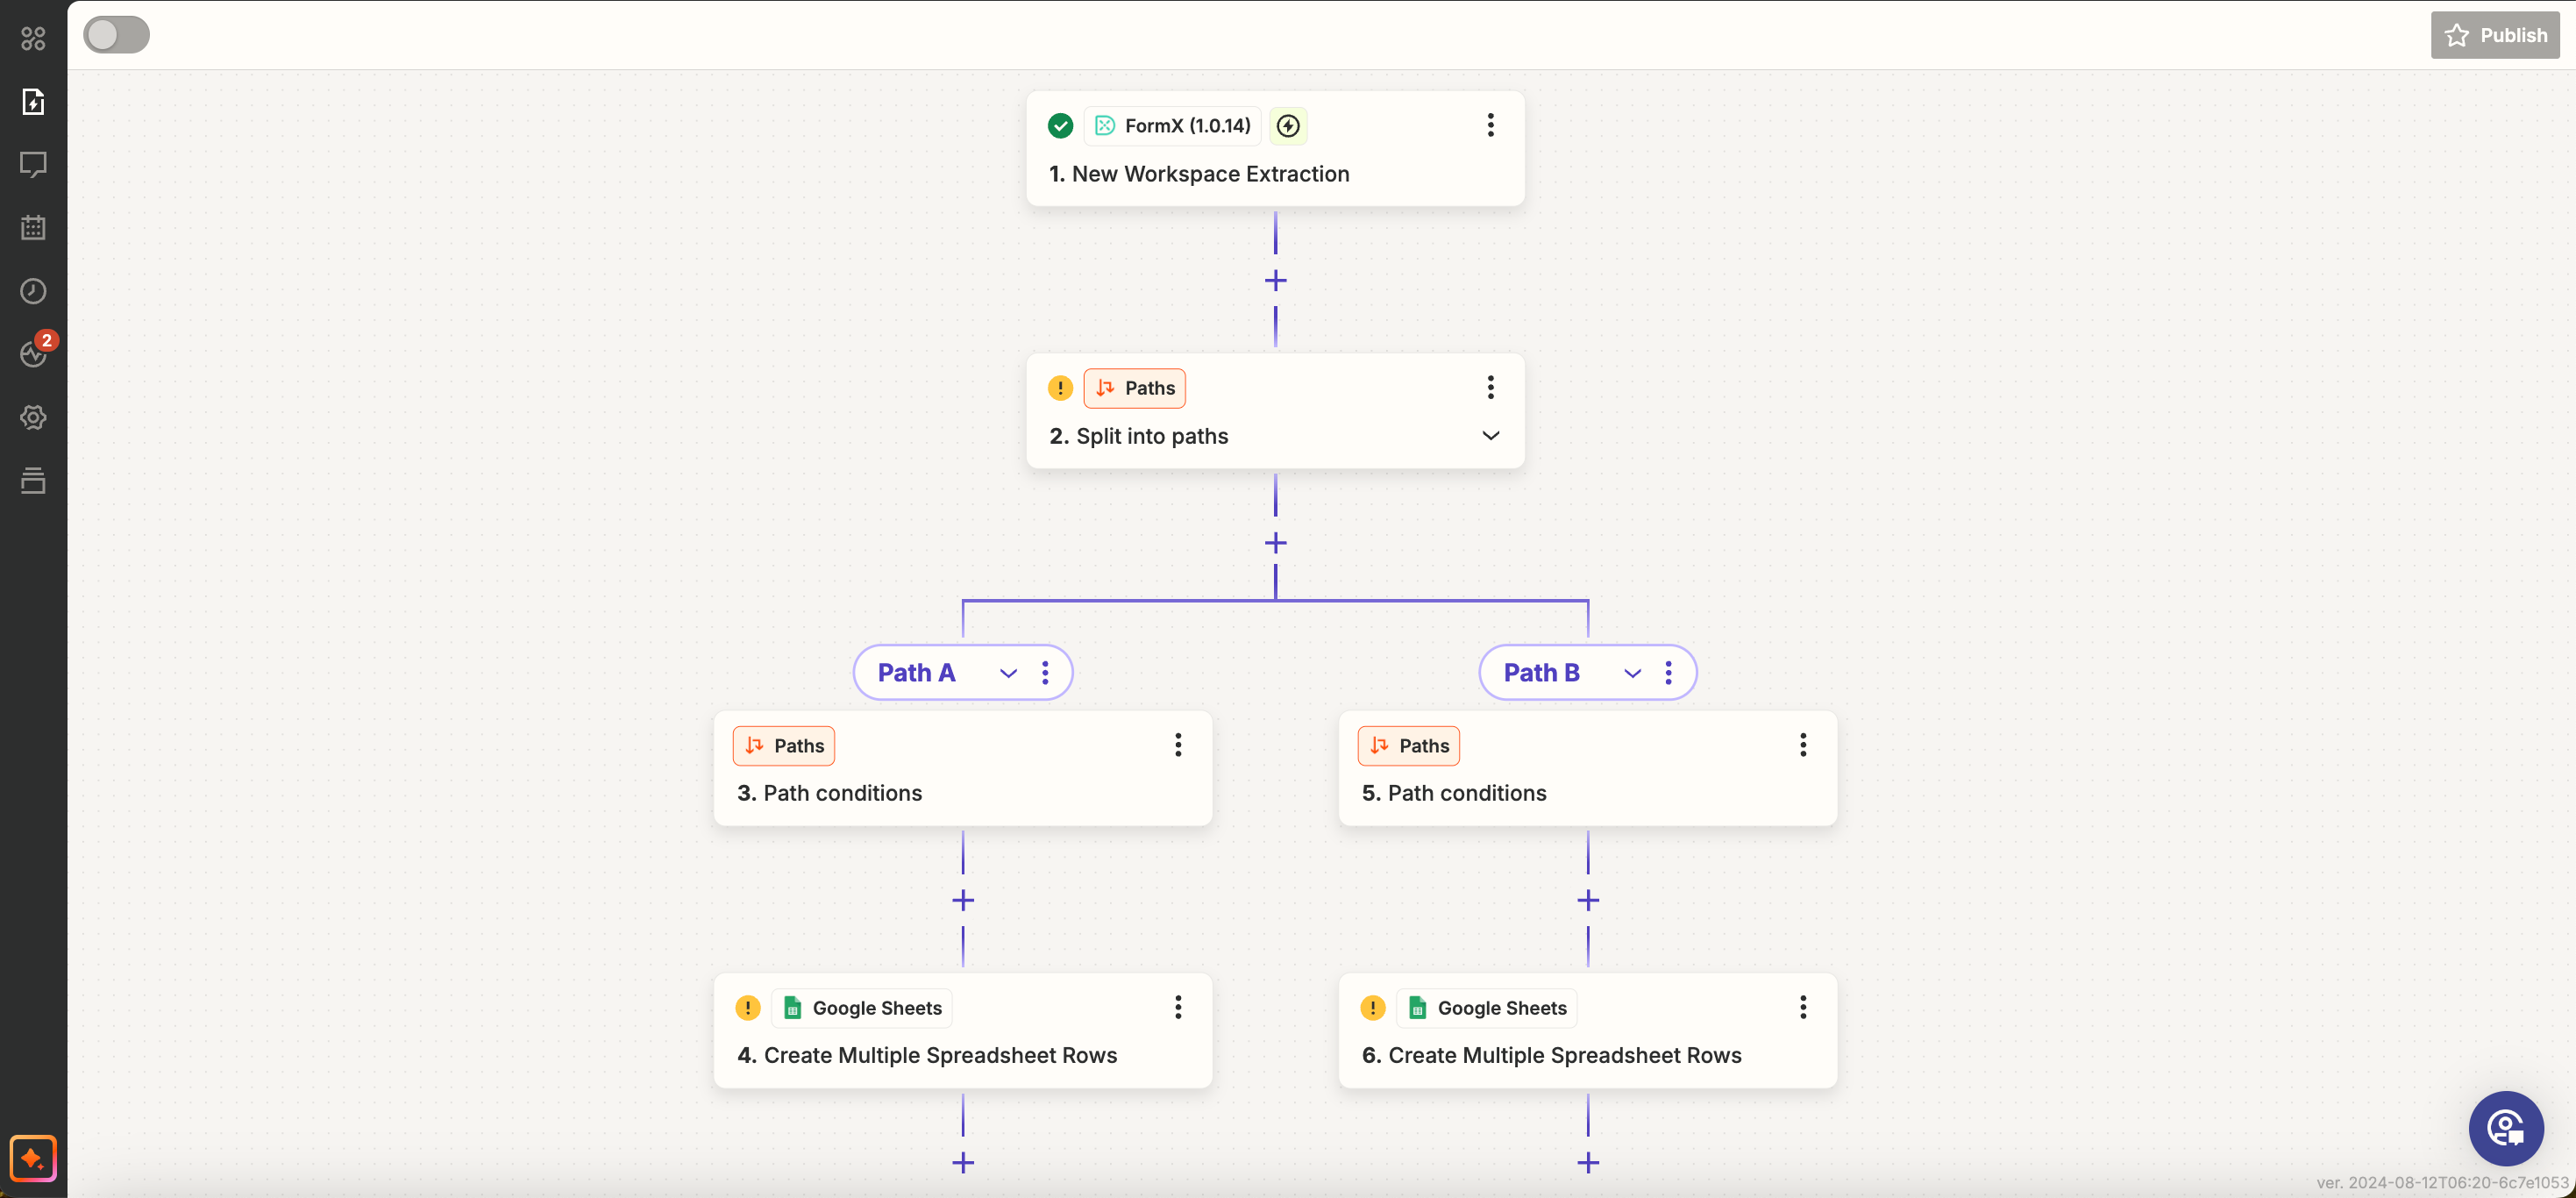
2. Handle success & error response separately
Add a Path by Zapier step. Once added, you will see path A & path B in your Zap.
You can set up a filter in each path. For example, you can filter successful extraction in path A and error extraction in path B. You will then be able to configure the follow up actions of successfully extractions and error extraction separately.
Updated 11 months ago